How to Set Up Veeam Backup & Replication Community Edition on Windows Server 2022
Introduction –
Veeam Backup & Replication Community Edition is a powerful, flexible, and reliable data protection solution. This step-by-step guide will walk you through how to set up this free tool on Windows Server 2022, as well as discuss permissions, best practices, and other essential factors.
In this article, we’ll guide you through the installation of the Community Edition (CE), which supports up to 10 workloads. A workload is defined as a physical server, a virtual machine, a cloud-based workload, a disk volume, or even a specific application
Step 1: Pre-Installation Requirements
Firstly, ensure that your Windows Server 2022 machine meets the system requirements for Veeam Backup & Replication. These include:
- A physical or virtual machine that is not joined to a domain.
- A CPU with a minimum of 4 cores, based on the x86-64 architecture.
- A minimum of 4GB RAM.
- A solid-state drive (SSD) with at least 60GB of space for the Veeam installation.
- A storage disk for backups, either file share or local, with at least 1 terabyte of space (recommended) formatted with the ReFS file system.
- .NET Framework version 4.7.2 or higher.
Step 2: Create a Veeam Service Account
It’s best to follow the principle of least privilege, which means that a user or process managing Veeam should have the minimum levels of access necessary to complete its task.
Here are the pros and cons of each approach:
- Local Administrator Account: Using the local administrator account can provide all the necessary rights to operate Veeam Backup and Replication software. However, using this account could potentially pose a security risk as it has full access to the system. If the credentials of this account were somehow compromised, an attacker would have full control over the system.
- Separate Local User on the Veeam Machine: This can be a better option compared to the local administrator account from a security standpoint, especially if this account is given only the required permissions necessary to operate the Veeam software. However, this user might not have sufficient privileges to backup certain system-level AD data or to perform certain system-level AD operations.
- Windows Domain Service Account: This would typically be the most recommended approach, especially if you’re planning to back up domain resources like AD users and computers. A domain account can be configured with precisely the necessary permissions on multiple resources across the domain. However, managing a domain account requires an operational Active Directory, which might not be available.
For this guide we will go with option 2. Here are a few reasons why option 2 (using a local user on the Veeam machine) might be the best choice:
- Security: Domain-joined Veeam servers are vulnerable to attacks that spread across the domain (like ransomware). By creating a local account with the necessary permissions, you can limit the scope of potential damage, should an attacker manage to compromise your system.
- Isolation: By not being joined to the domain, the Veeam VM is isolated from domain-level issues or threats. This makes it harder for attackers to compromise the backup server if they manage to compromise the domain.
- Limited Impact: As the local account only exists on the Veeam VM, even if it were compromised, the impact would be limited to that machine and not the entire domain.
However, keep in mind that this approach has its own set of challenges:
- Management: Managing local accounts can be more difficult compared to domain accounts, especially if you have multiple machines.
- Limited Access: As a local account, it might not have the necessary permissions to backup or interact with certain domain-specific resources.
- No GPO Processing/Policy: Local accounts and non-domain-joined machines can’t leverage Group Policy Objects (GPO), which can help manage security settings and other configurations at scale.
Creating a local user account and giving it the necessary permissions to manage Veeam Backup & Replication involves several steps. Here’s a basic guide, assuming that you’re using a version of Windows Server:
Creating a Local User Account:
- Open the Server Manager Dashboard. In the top-right corner, click Tools, and then click Computer Management.
- In the Computer Management window, expand Local Users and Groups.
-
Right-click Users, and then click New User.
- In the New User dialog box, type the appropriate information in the User name, Full name, Description (optional), Password, and Confirm password boxes.
-
Uncheck User must change password at next logon, Check Password never expires.
- Click Create, and then click Close.
- Right click on the new account and select Properties then click on the Member Of tab. Click Add and add the Administrators group. Click Apply and OK.
Assigning Necessary Permissions:
The necessary permissions for a user to manage Veeam Backup & Replication depend on the specific tasks that the user needs to perform. However, at a minimum, the user will need permissions to:
- Run the Veeam Backup Service
- Access the file system locations where backup files are stored
- Access any remote systems that the Veeam server needs to interact with
Assign these permissions as follows:
-
To allow the user to run the Veeam Backup Service, open the Services control panel (you can find this by searching for “Services” in the start menu). Find the Veeam Backup Service in the list, right-click it, and select Properties. In the Log On tab, enter the new local user’s username and password. Stop and Start the service (Right-Click on it) for the changes to apply.
-
To allow the user to access the necessary file system locations, use the Security tab in the properties window for each relevant file or folder. Add the new local user and assign it the necessary permissions (usually, this will be “Full Control”).
-
If the Veeam server needs to access remote systems (such as a hypervisor, virtual machine, or physical host), you’ll need to add a local user’s (of the remove system) credentials to Veeam. Open the Veeam console, go to the main menu and select Manage Credentials. Click Add, enter the new local user’s username and password, and give the credentials a description.
Please note that the exact steps may vary slightly depending on the version of Windows Server and Veeam Backup & Replication you’re using. Always consult the official documentation or seek assistance from Veeam’s support if you’re unsure.
These steps should give the new local user the necessary permissions to manage Veeam Backup & Replication. Remember to follow the principle of least privilege: Only assign the permissions that are necessary for the tasks the user needs to perform.
Removing Unnecessary Permissions (Recommended)
For increased security, you may consider removing permissions for broad groups like ‘Domain\Users’, ‘Users’, and ‘Everyone’ from the advanced permissions of your file share. Before doing this, ensure you won’t accidentally lock out users who need access. Always maintain an administrative account with full permissions on the file share.
Step 3: Download and Install Veeam Backup & Replication Community Edition
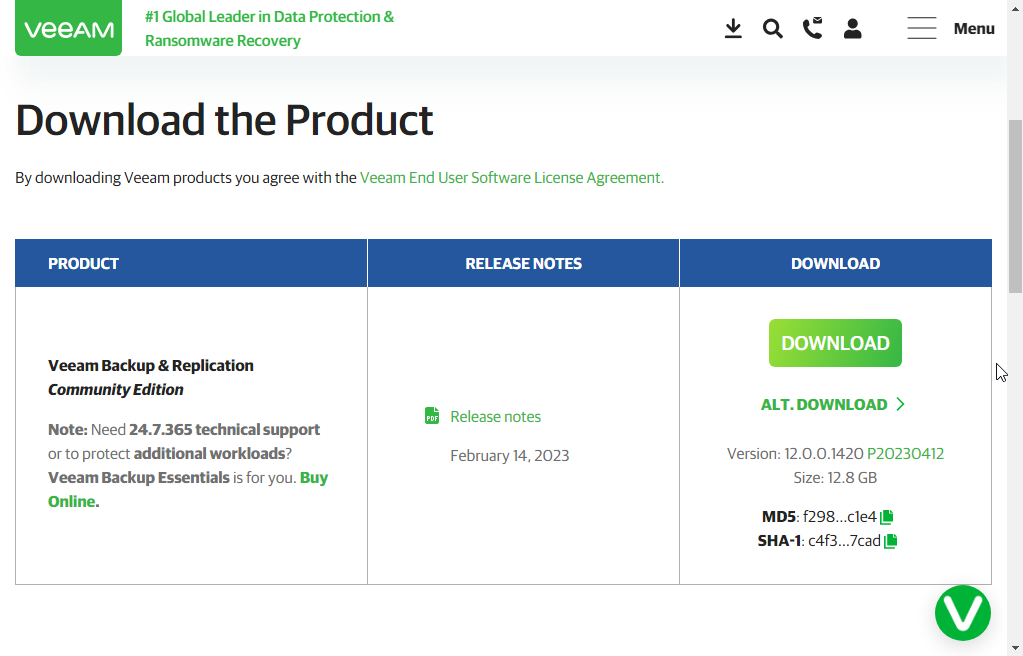
Navigate to the Veeam website and download the Community Edition. You will need to sign in with your Veeam account or create one if you don’t already have one. Read and accept the EULA’s.
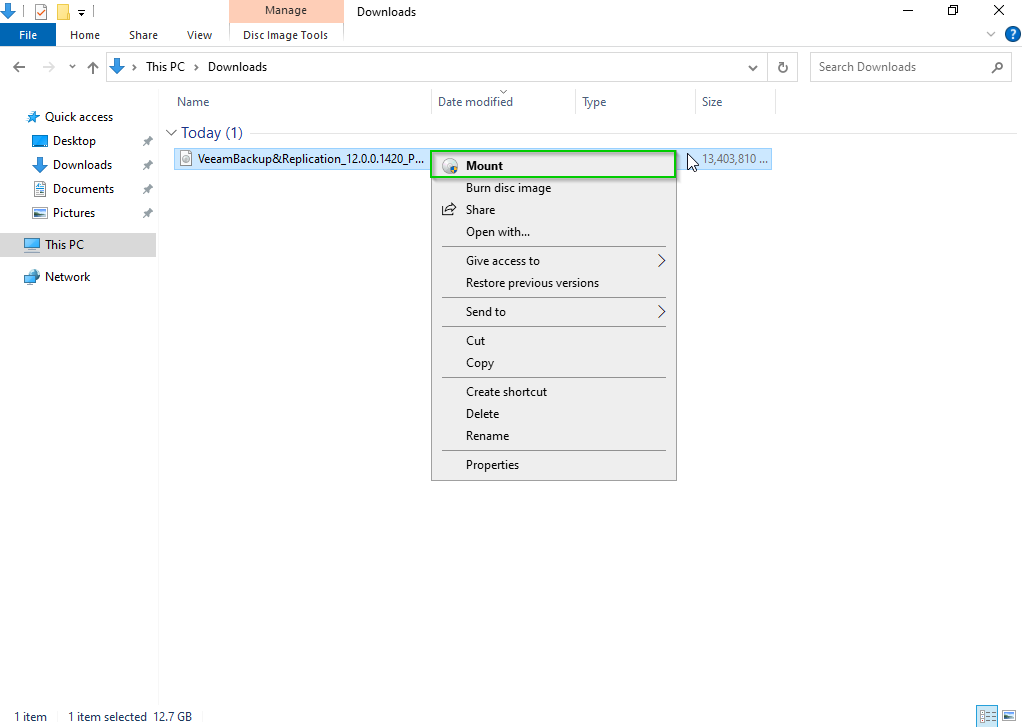
Right click on the downloaded VeeamBackup&Replication disk image, and click “Mount”. When prompted, click “Open”. Launch the installer by running “Setup” in the mounted Veeam directory.
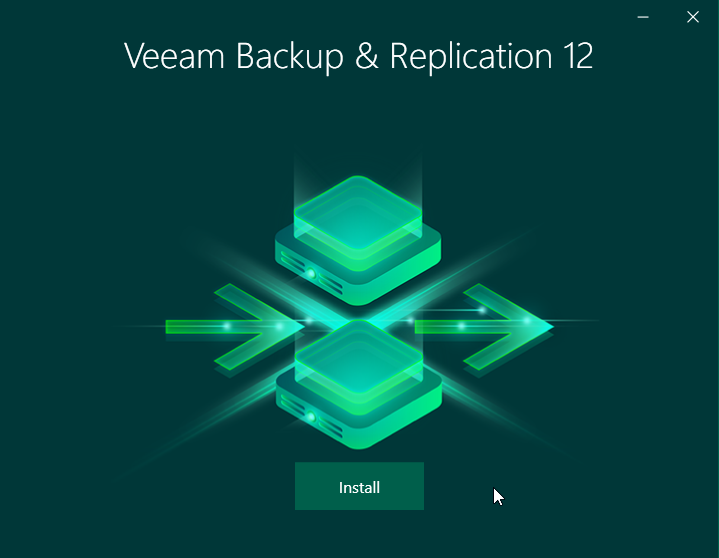
When the Veeam installer launches, click Install.
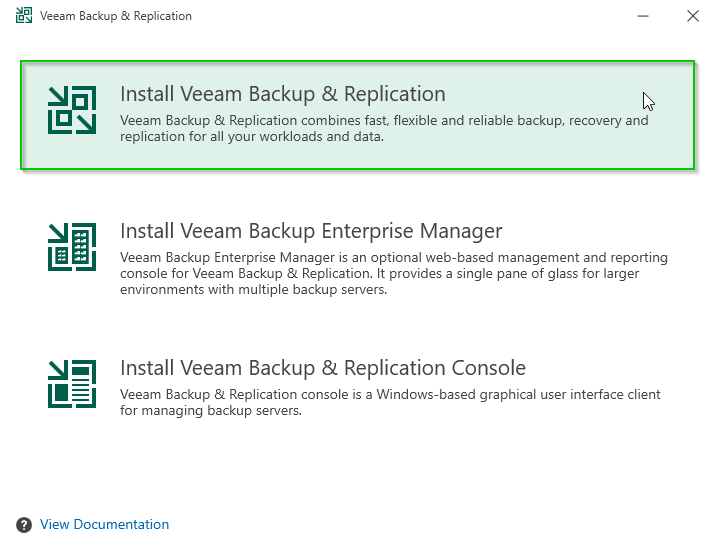
Select the top option, “Install Veeam Backup & Replication” and wait for the setup wizard to initialize.
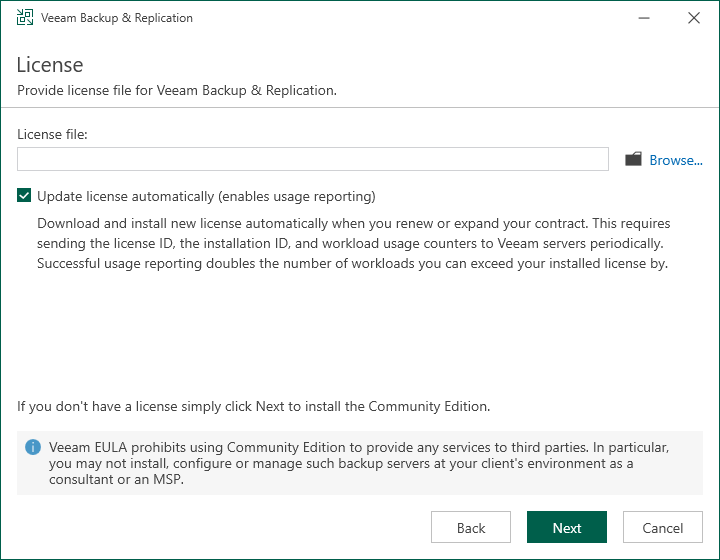
Accept the terms, and enter a license file if you have one (Community Edition / Free users don’t need to enter anything). Click “Next” to continue.
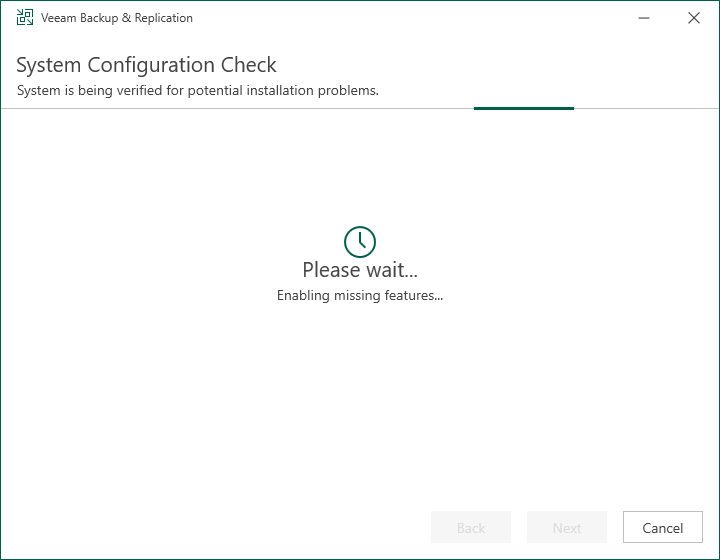
Wait for Veeam to perform a system configuration check.
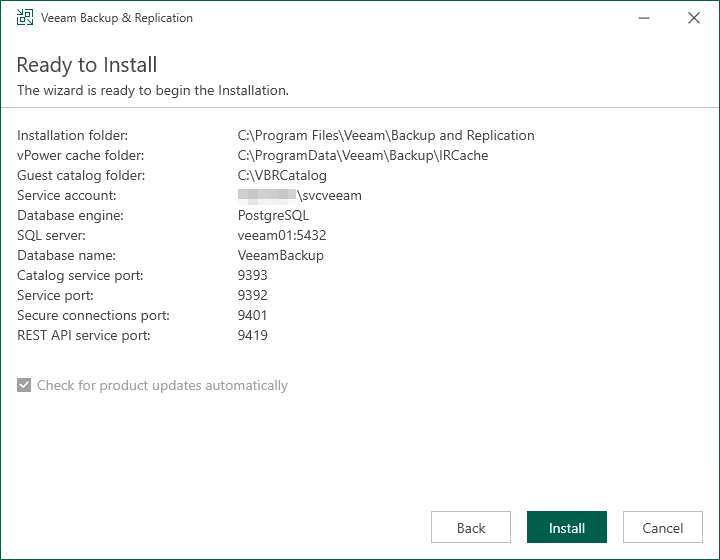
We will need to click on Customize Settings to configure using the local Veeam service account created in Step 1. click on The following user account and enter the username and password of the local veeam account then click Next.
- Accept the database defaults and click Next.
- Accept the data locations and click Next.
- Accept the default port configuration and click Next.
- Finally, click Install to begin the installation.
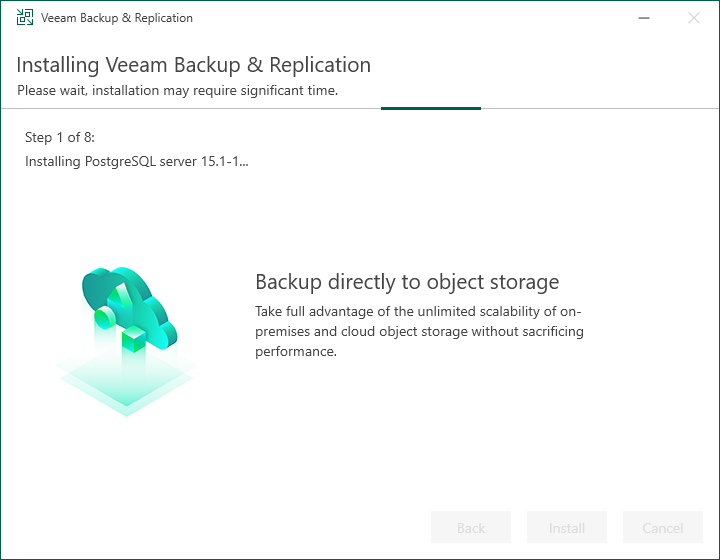
Wait patiently as Veeam installs. This process could take 20 - 30 minutes depending on your system hardware.
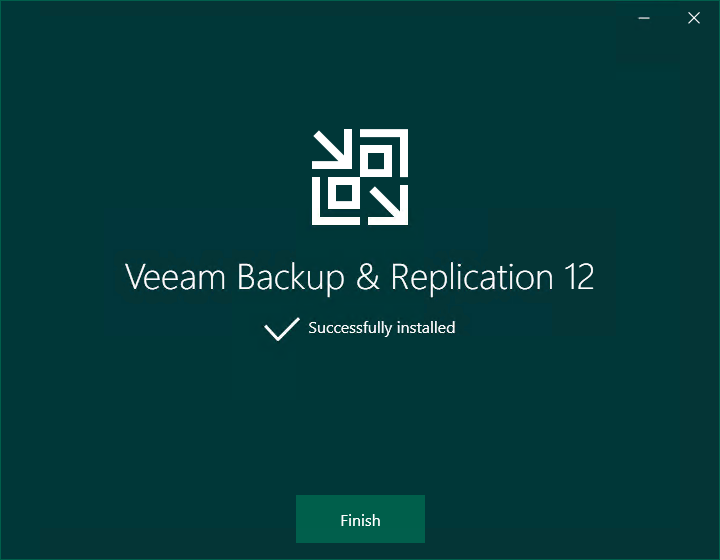
Step 4: Launch the Veeam Console
In the Veeam console, log in with the Veeam services to use the service account created earlier.
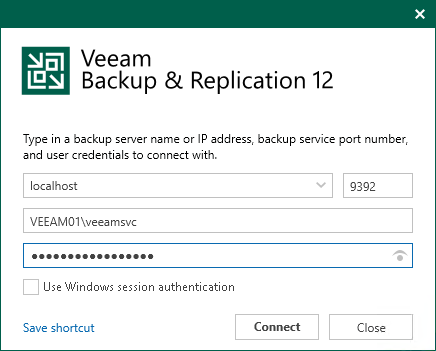
If you get prompted with a Components Update window, select the servers to update veeam’s components on (check box) then click Apply. The updates will take several minutes. Click Finish when the updates complete.
Step 5: Set Up the Backup Repository
Once installed, launch the Veeam console and go to the ‘Backup Infrastructure’ view. Right-click ‘Backup Repositories’, select ‘Add Backup Repository’.
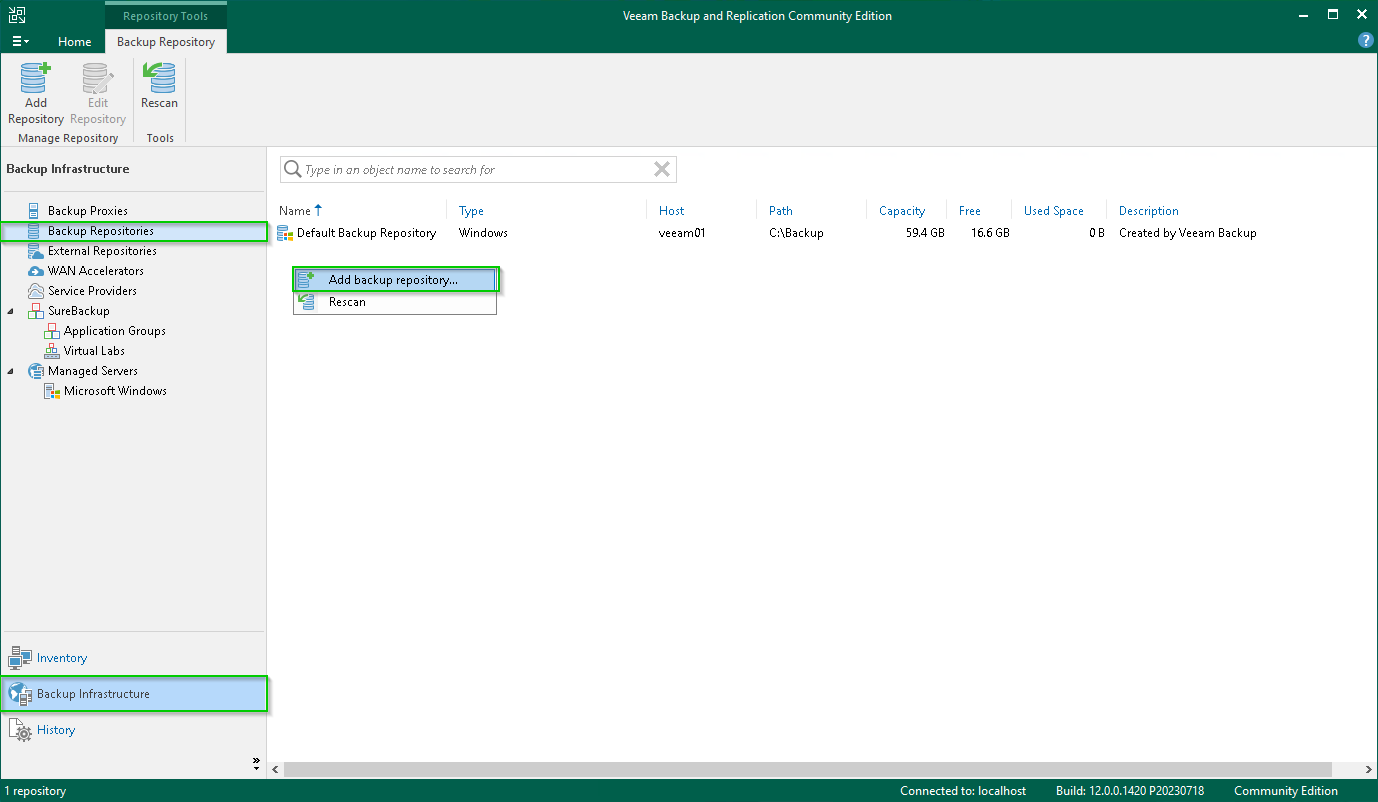
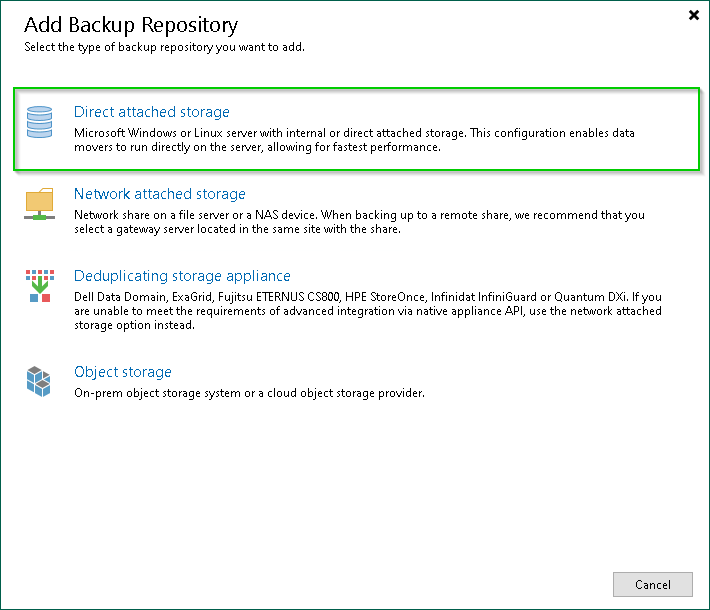
There are 4 types of backup repositories:
- Direct attached Storage.
- Network attached Storage.
- Deduplicating storage appliance.
- Object storage.
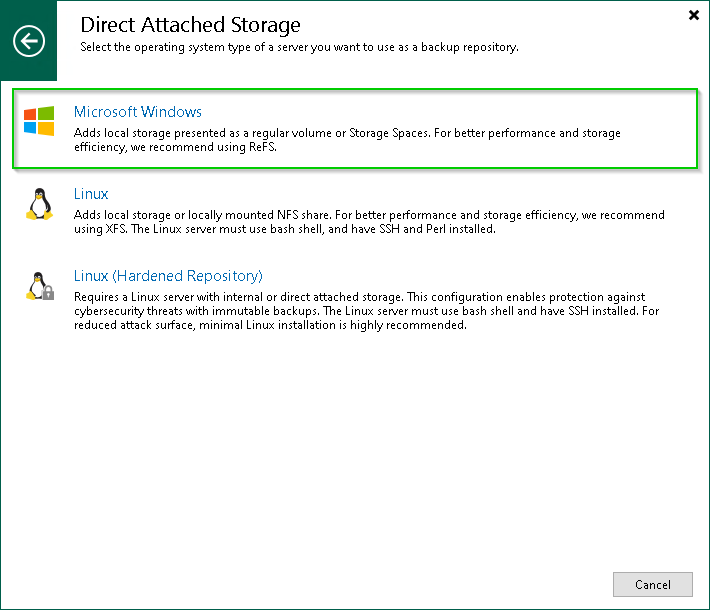
The most common storage types would be either option 1 or 2. For this tutorial we will select option 1, Direct attached storage since the storage is attached to the Veeam server as disk storage.
Next, select the operating system type, in this case Microsoft Windows.
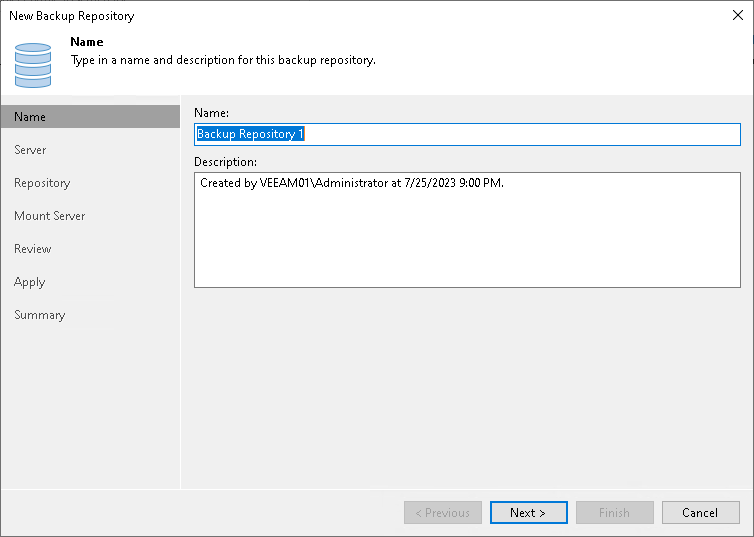
Provide a name to the backup repository and click Next.
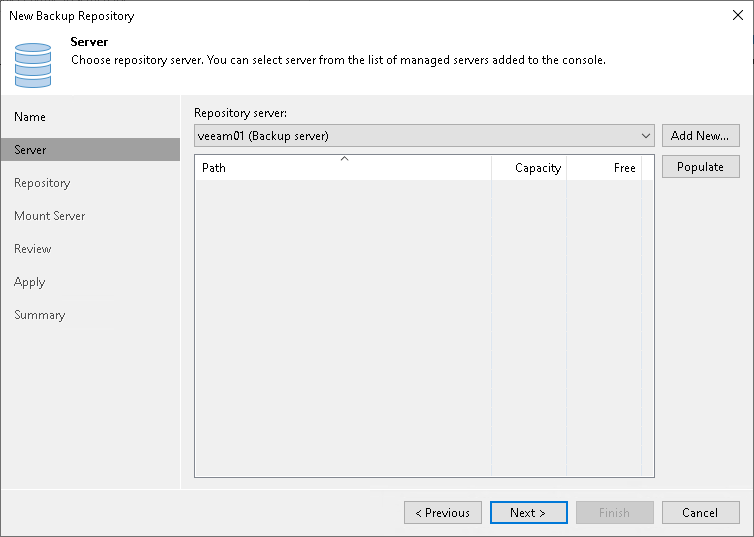
Select the veeam repository server and click Next.
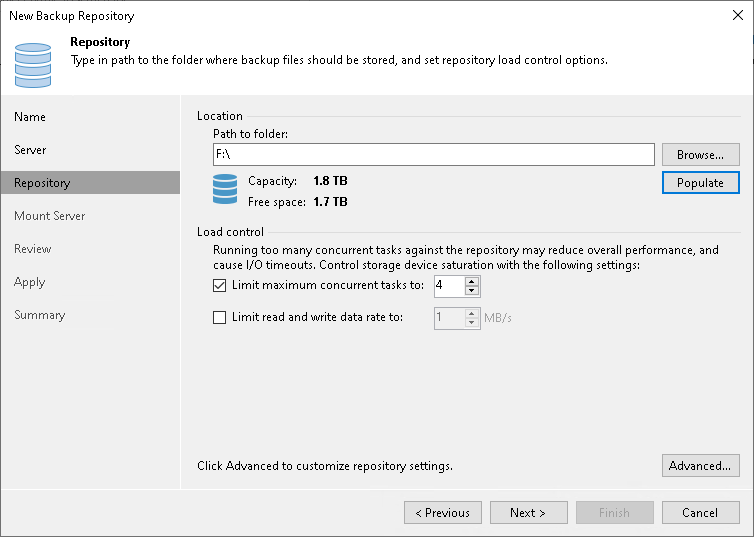
Now select browse and navigate to the storage location that you wish to store backups on. Click Populate and configure additional settings if you wish. Click Next to continue.
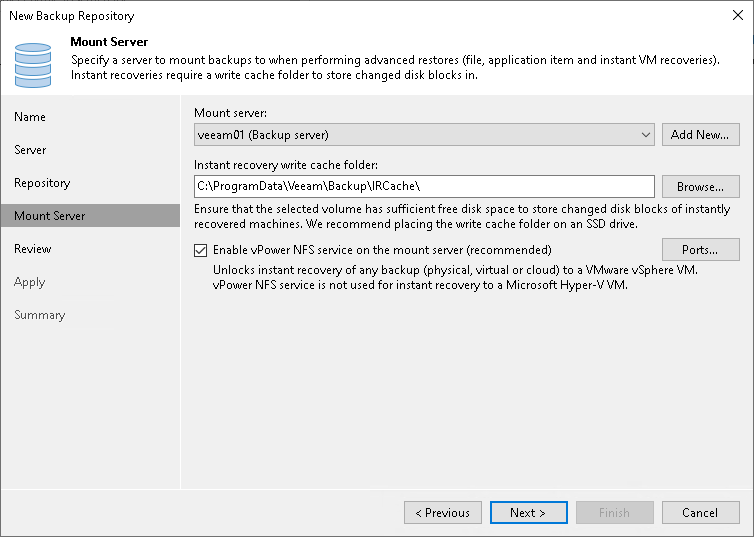
Specify mount server options (the defaults should suffice) and click Next to continue.
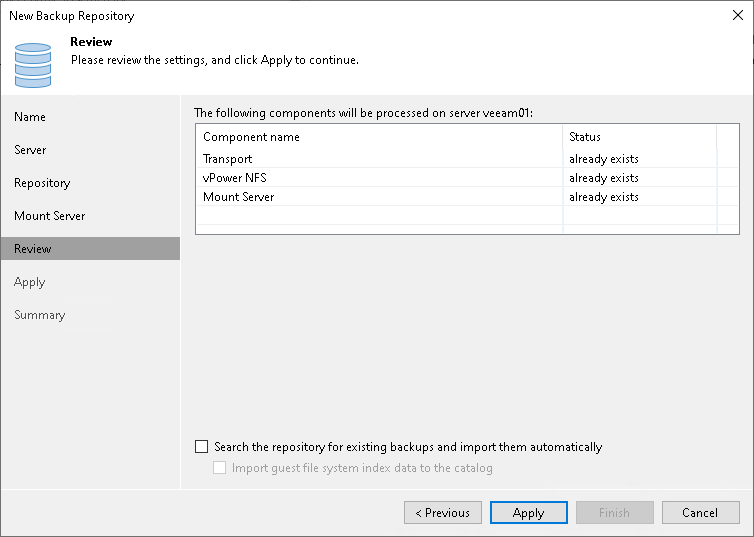
Review the settings and click Apply to continue.
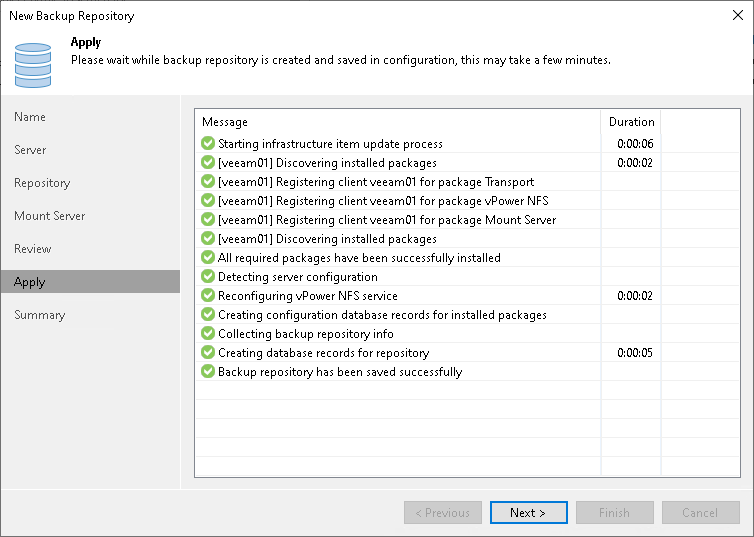
Click Next to view the repository creation summary.
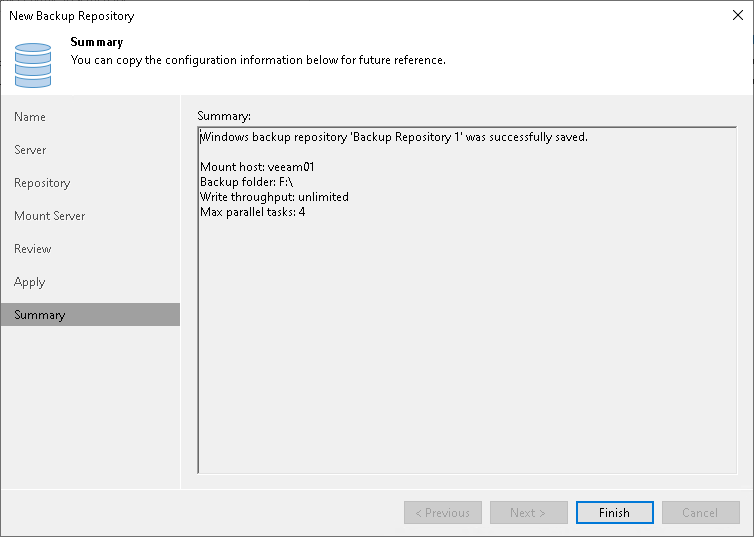
Finally click Finish to complete the setup.
Step 6: Install the Veeam Agent
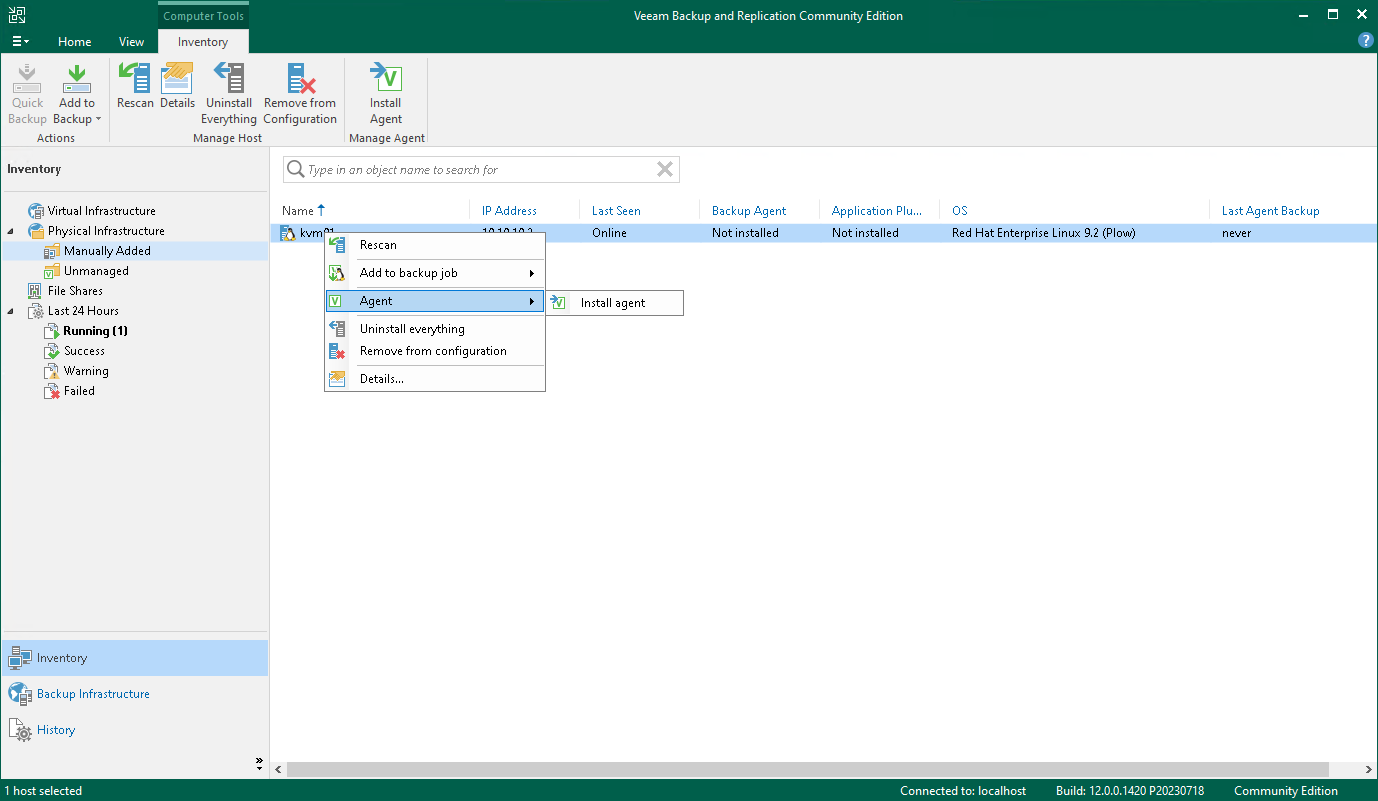
In the Veeam console, select Inventory then select Manually Added under Physical Insfrastructure. Find the computer you wish to install the agent on, right click on it and select Agent, Install agent.
Step 7: Create and Schedule Your Backup Job
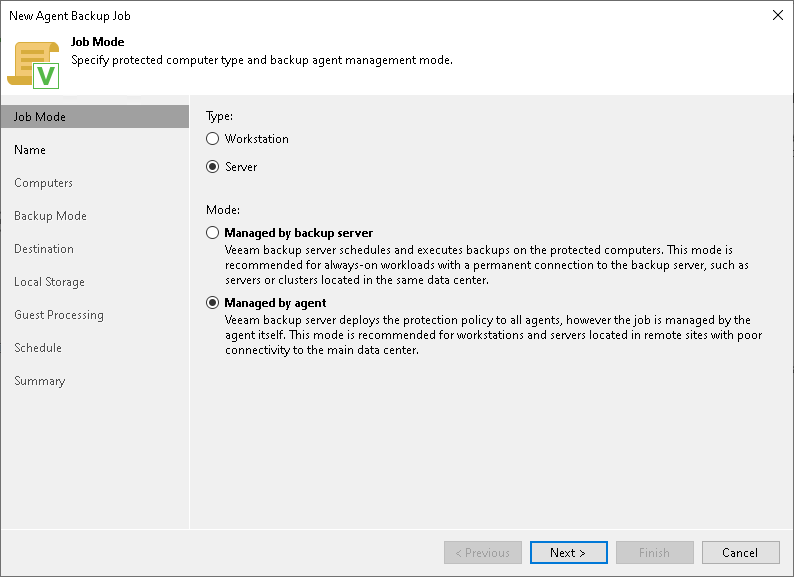
Finally, in the Veeam console, go to ‘Home’, then ‘Jobs’, and click ‘Backup Job’. For the purpose of this tutorial, we will select Managed by agent. You will generally use the Managed by Agent mode because Veeam Agent for Linux allows you to back up the entire system, individual directories, and even individual files. Also, it can back up to a Veeam repository, a local disk, a network share (NAS), or even a cloud object storage. Click Next.
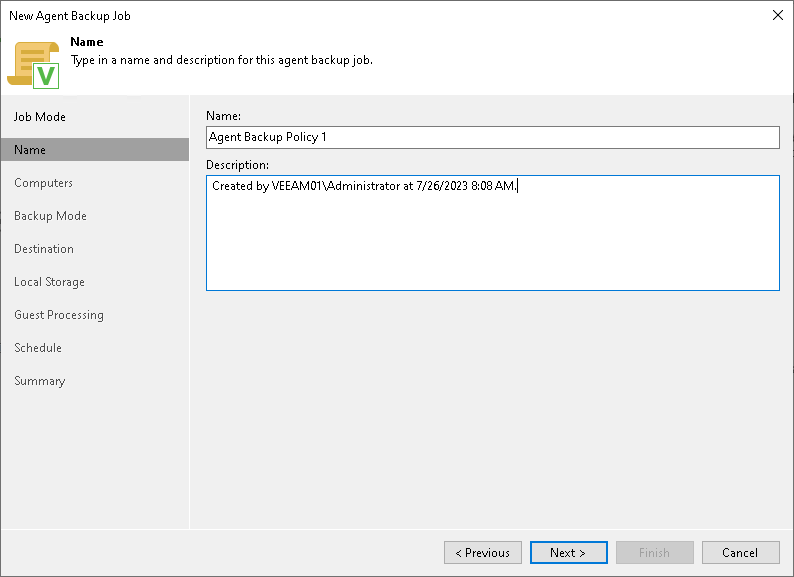
Provide a name for the backup job and click Next.
Add the server by clicking Add then selecting Individual computer…
Enter the IP address or hostname of the computer you wish to back up, then click Add, Stored, Linux Account to add credentials. The credentials will be a local account on the machine you are backing up. Click Elevate account privileges automatically and Add account to the sudoers file, then click OK 3 times then click Next to continue.
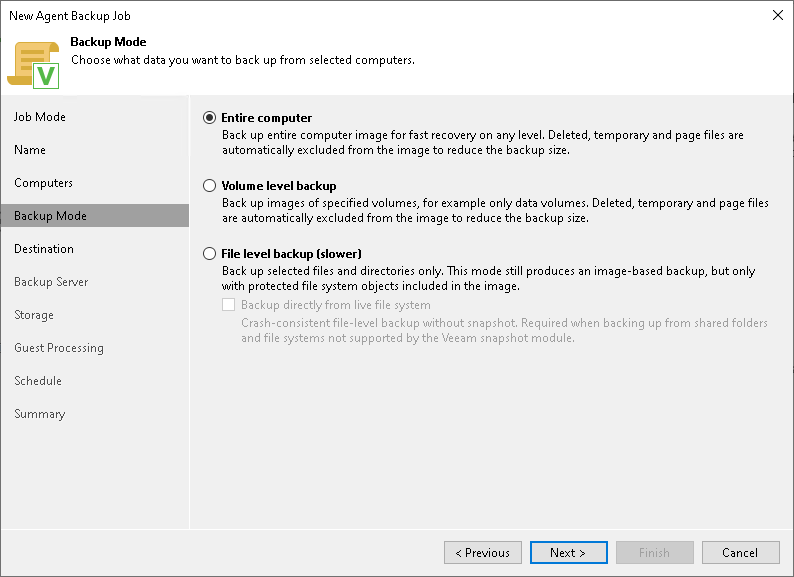
In the context of a KVM host, running several virtual machines, we will need to protect the Entire computer (OS, configurations, and VMs), an entire computer backup is likely the best option. This backup will cover everything in one operation and can simplify disaster recovery. Select *Entire computer** then click Next.
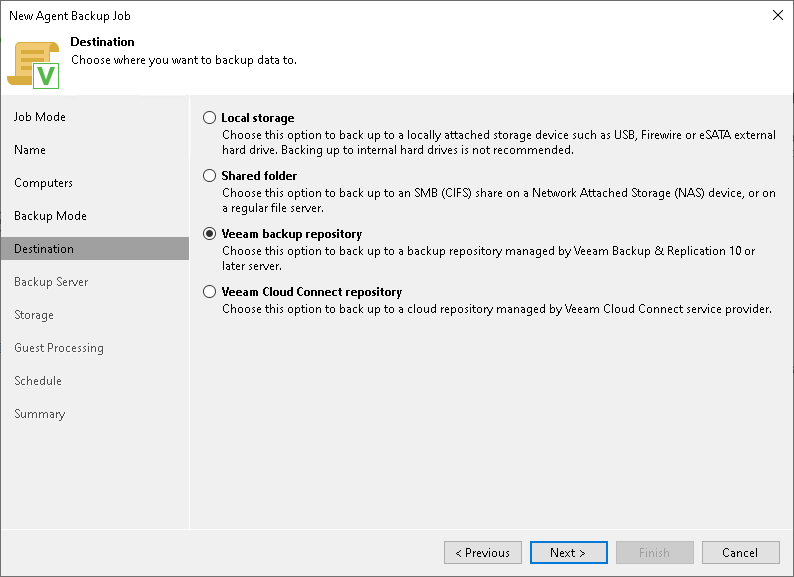
Since we have already created a backup repository, select Veeam backup repository then click Next.
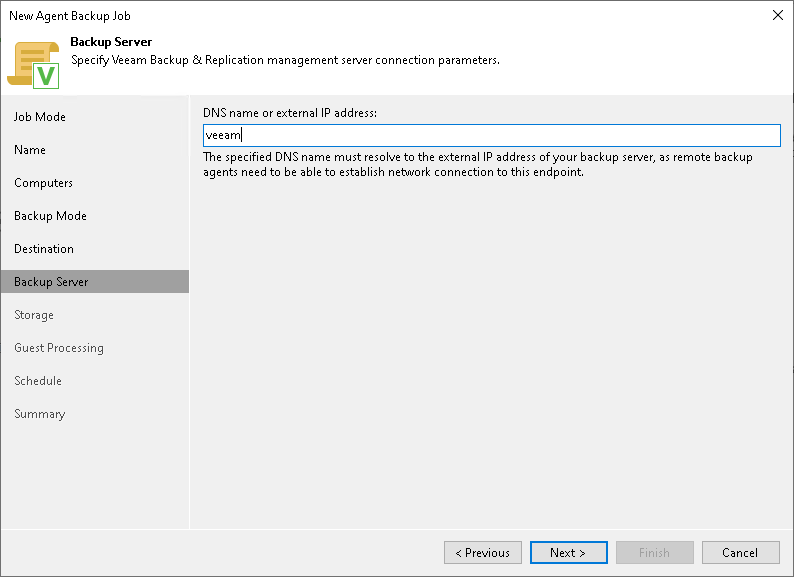
Specify the backup server by DNS name or external IP then click Next.
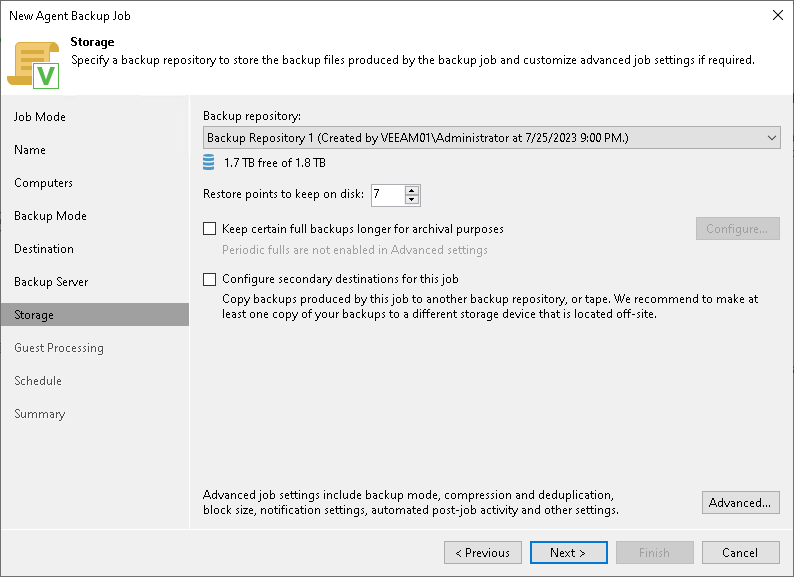
Important: Click on the Backup Repository dropdown and select the bacup repository that we made earlier. Click Next.
Click Enable guest file system indexing and leave Enable application-aware processing unchecked (it’s primarily for the Windows operating system). Guest File Indexing allows you to index files inside of the guest operating system of the VM, which helps in performing granular recovery and searching for individual files within backups. If you need to frequently restore individual files or you want the ability to search within your backups, enabling this option can be very helpful. By default, this option will exclude the following directories: cdrom, /dev, /media, /mnt, /proc, /tmp, /lost+found – Note that you can add or remote directories based on your requirements. Click Next to continue.
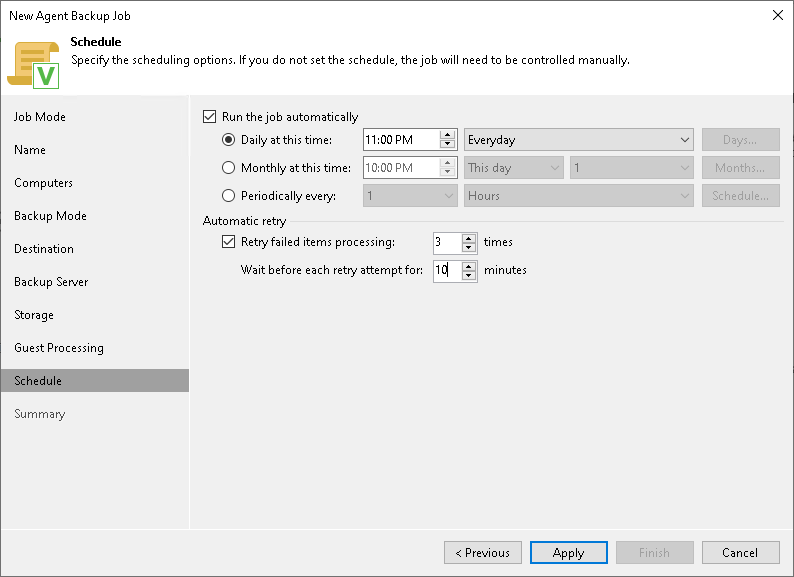
Finally, set the backup job schedule and click Apply.
Click Finish.
Wrapping Up
Congratulations! You’ve now successfully set up Veeam Backup & Replication Community Edition on Windows Server 2022 and followed best practices for setting up permissions and security.
Remember, it’s important to monitor your backups.
Featured Tweet
Here's a step-by-step guide on how to set up Veeam Backup & Replication Community Edition on Windows Server 2022.#Veeam #Backups #WindowsServer #SysAdmin #ITPro #HomeLab #TechBlogshttps://t.co/wbmZEi33Zi
— rcdevops (@rcdevops) February 3, 2024

