Installing And Configuring Proxmox VE (Virtual Environment)
Introduction –
Proxmox Virtual Environment (Proxmox VE) is an open-source server virtualization environment that is ideal for deploying virtual machines and containers. Whether you’re looking to set up a simple home lab or a complex enterprise network, Proxmox offers a wide range of features to suit your virtualization needs. In this guide, we will walk through the installation and basic configuration of Proxmox.
Prerequisites Before you begin the installation, you will need:
- A dedicated server or computer with at least:
- Intel 64-bit CPU (Recommended 4+ cores)
- 4GB RAM (Recommended 32GB+)
- One NIC (Network Interface Card)
- Minimum 8GB Disk Space (Recommended two 256GB+ solid state drives in RAID1 or RAIDz1 if using ZFS software raid)
- A Proxmox VE ISO file, which you can download from the official website.
- A USB drive for the installation media.
- A tool to create a bootable USB stick. I recommend using Ventoy or Rufus. If you’re on an enterprise server, consider mounting the ISO via iDRAC, iLO, or a similar remote management solution.
Create a Bootable USB Drive
Using Ventoy
- Download and install Ventoy from their official website.
- Insert your USB drive into your computer.
- Run Ventoy and select the appropriate USB drive.
- Click
Installto format the drive and make it bootable. - Drag and drop the Proxmox VE ISO file into the Ventoy USB drive.
Using Rufus
- Download and install Rufus from their official website.
- Insert your USB drive into your computer.
- Run Rufus and select the USB drive, partition scheme, and target system.
- Browse to your Proxmox VE ISO file by clicking the
Selectbutton. - Click
Startto create the bootable USB drive.
Note: For enterprise servers, you can skip this mount the ISO via iDRAC, iLO, or a similar solution.
Boot from USB Drive and Start the Installer
- Insert the bootable USB drive into the target server/computer.
- Power on the machine and boot from the USB drive. You may need to adjust the boot order in BIOS/UEFI settings.
- On the boot screen, select
Install Proxmox VEand hitEnter.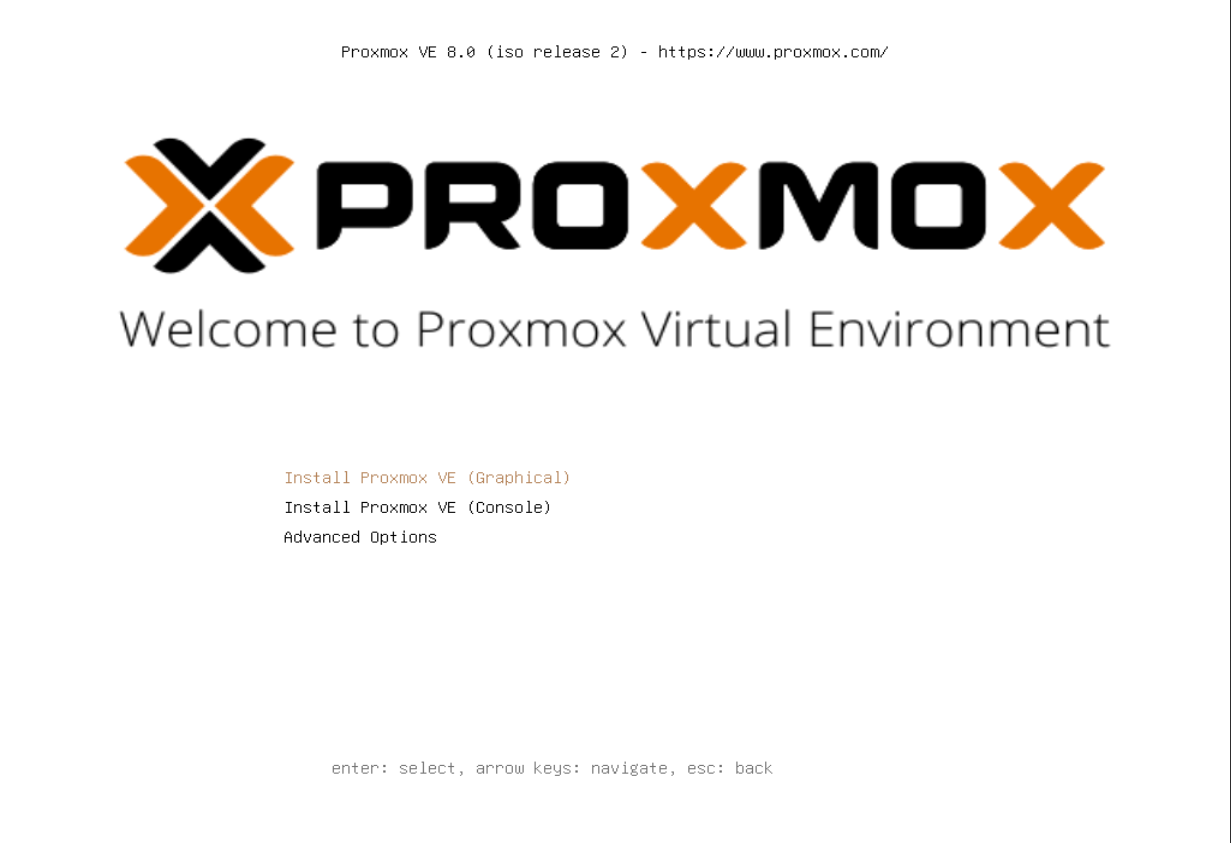 The Proxmox installer will begin. Note that it could take 15 - 20 minutes for the installer to load and initialize even on modern hardware.
Proxmox Installer Walkthrough
- Agree to the terms and conditions to proceed.
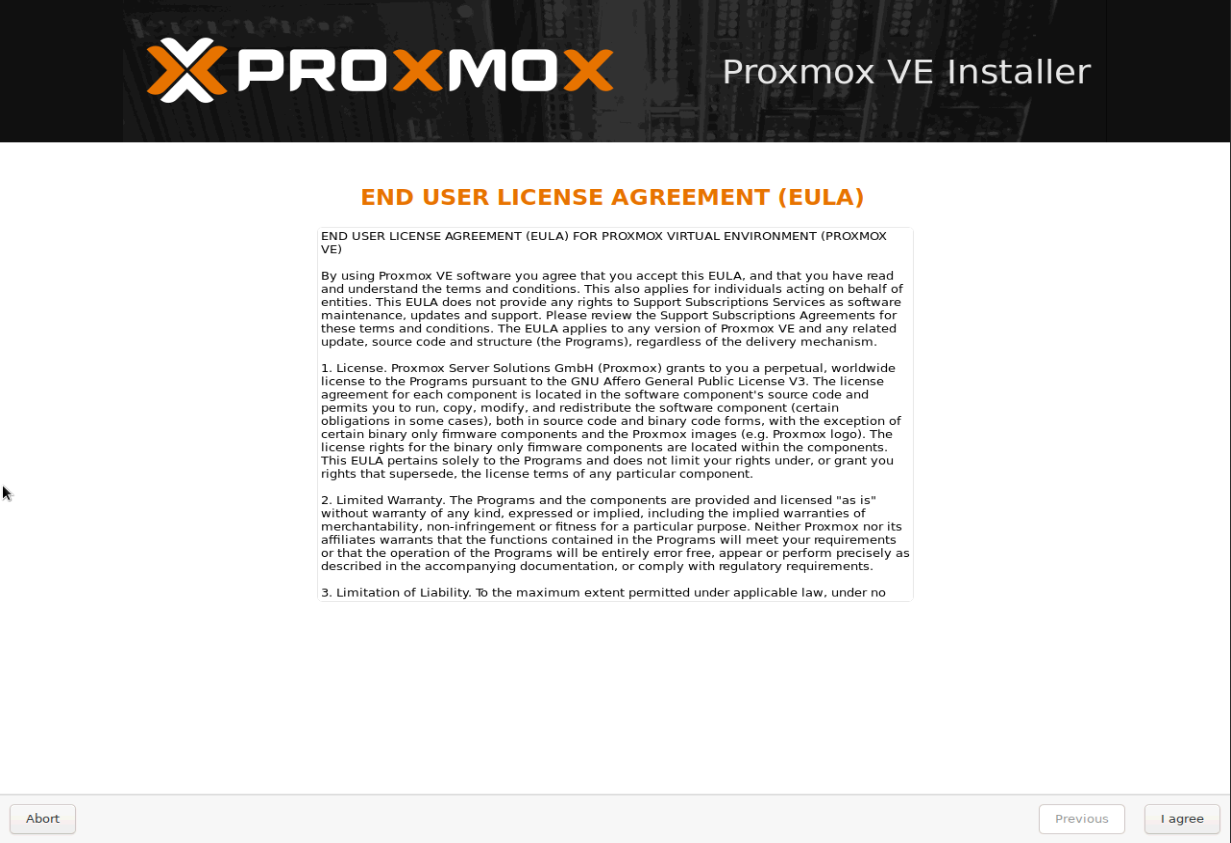
- Select the target disk for installation and click
Next.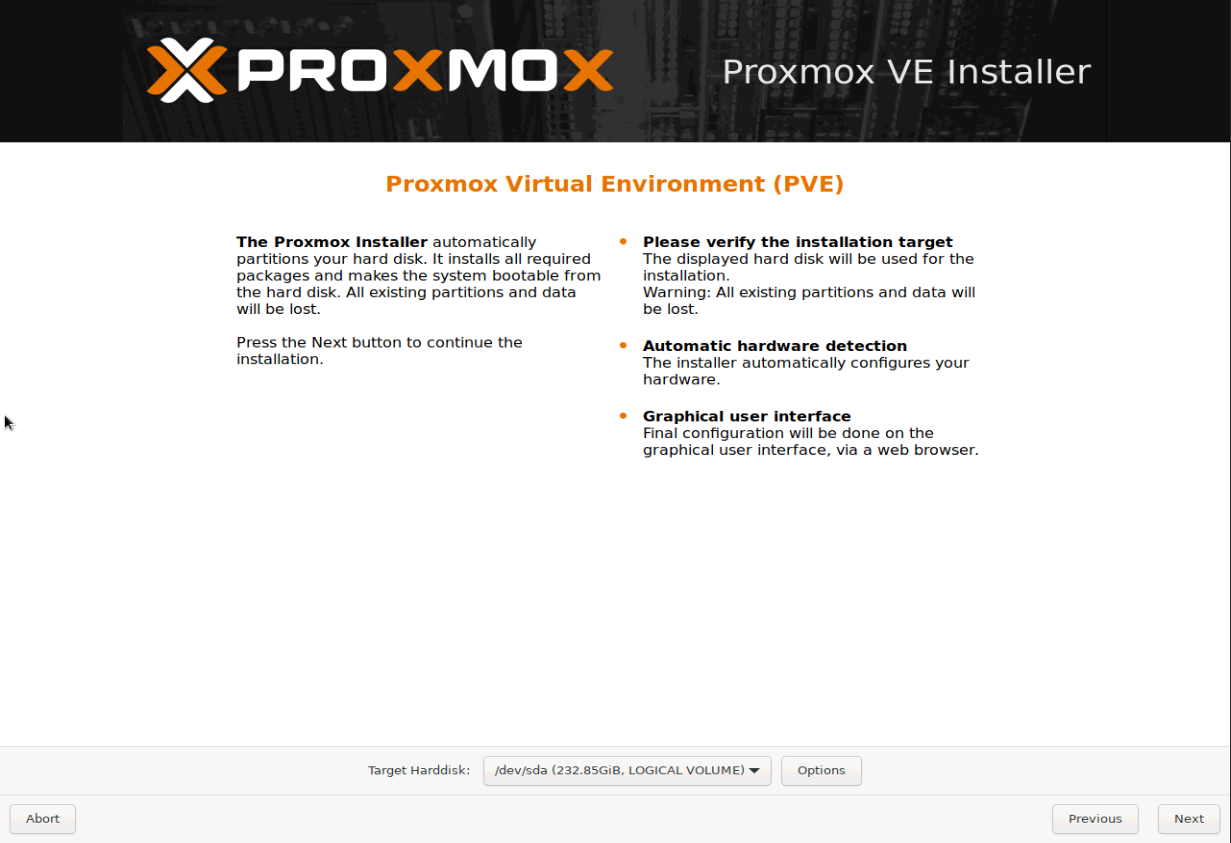
- Enter your country, time zone, and keyboard layout; then click
Next.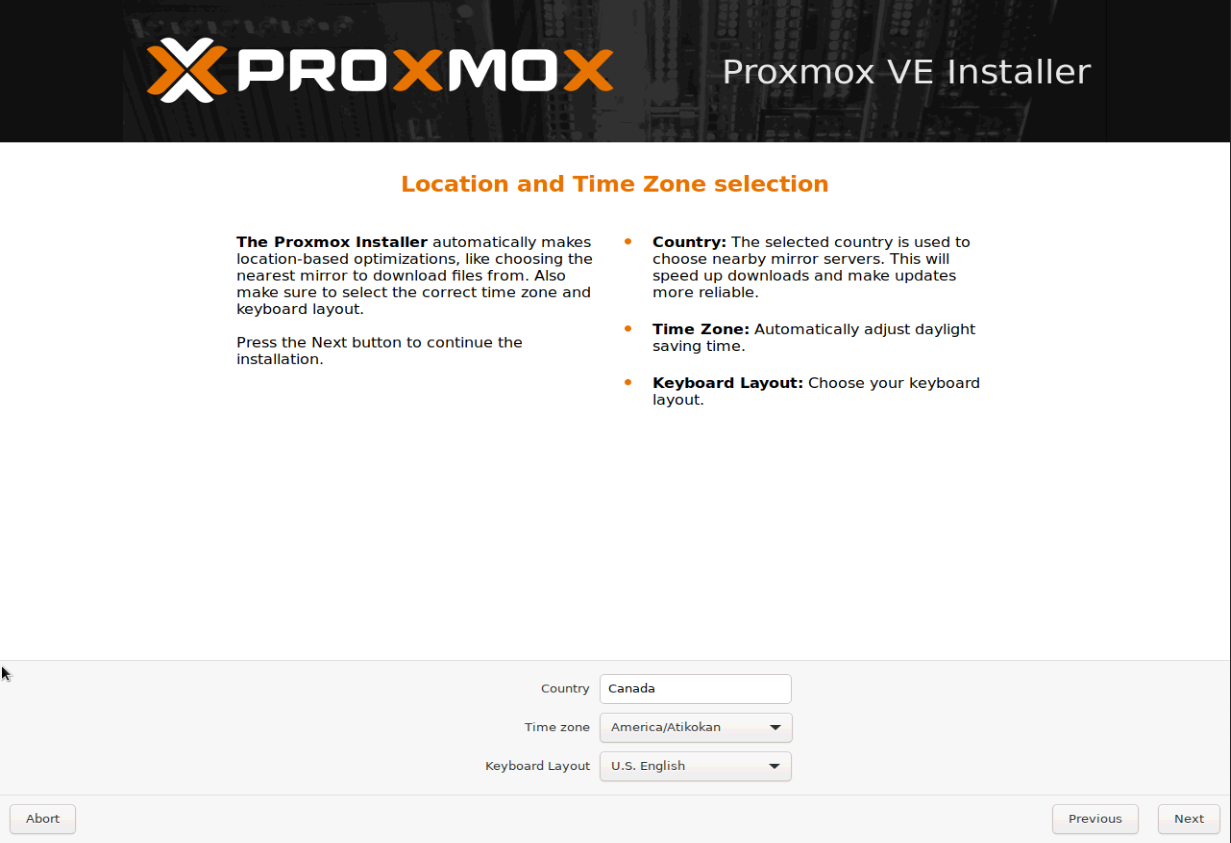
- Configure the password and email address for the root user.
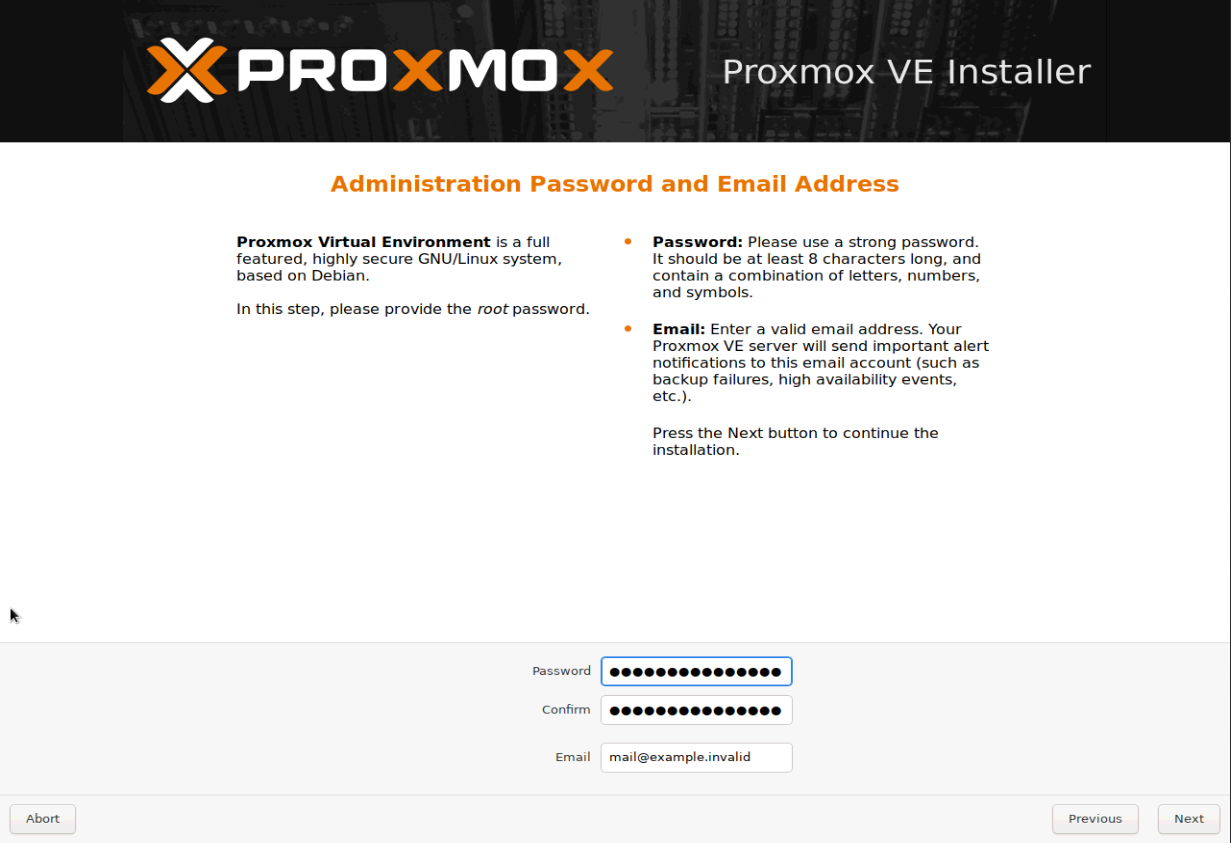
- Set the hostname, IP address, netmask, gateway, and DNS server for your Proxmox server. Confirm and click
Next.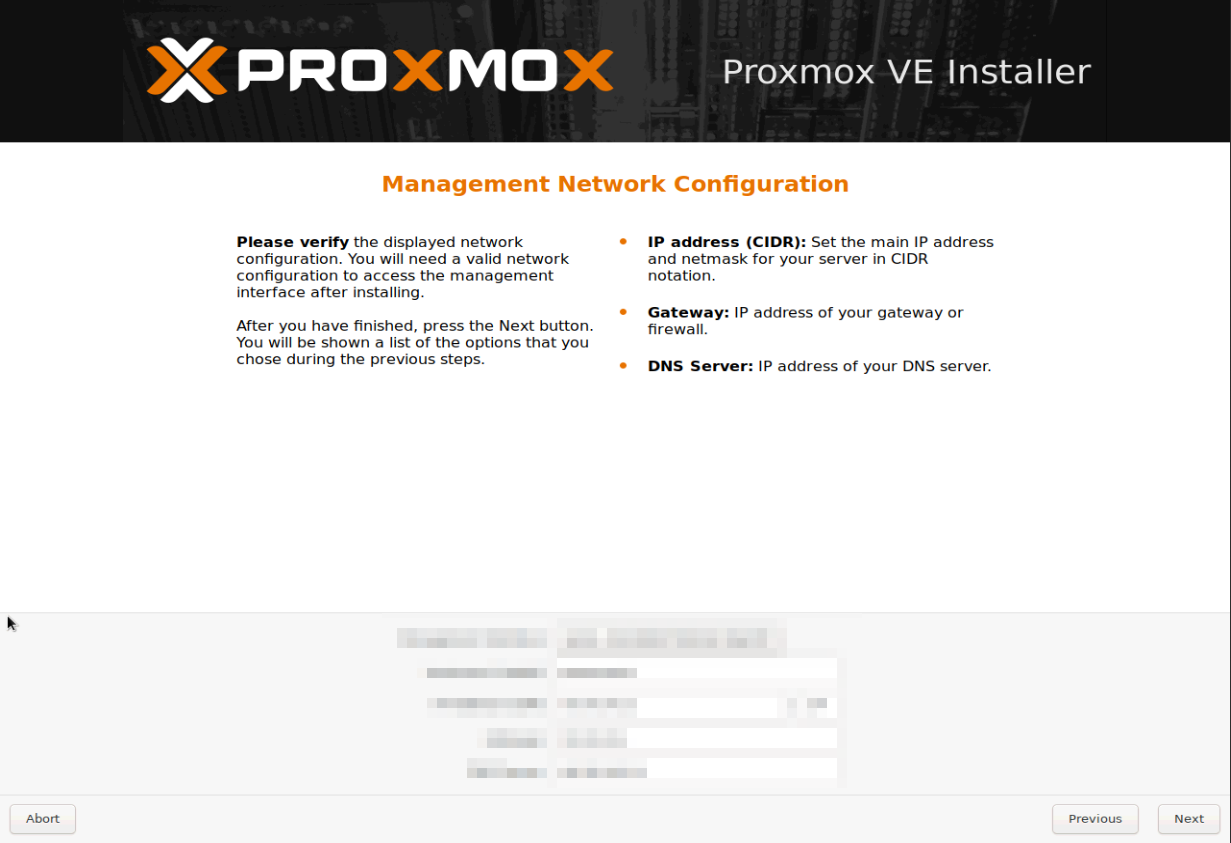
- Review your settings and click
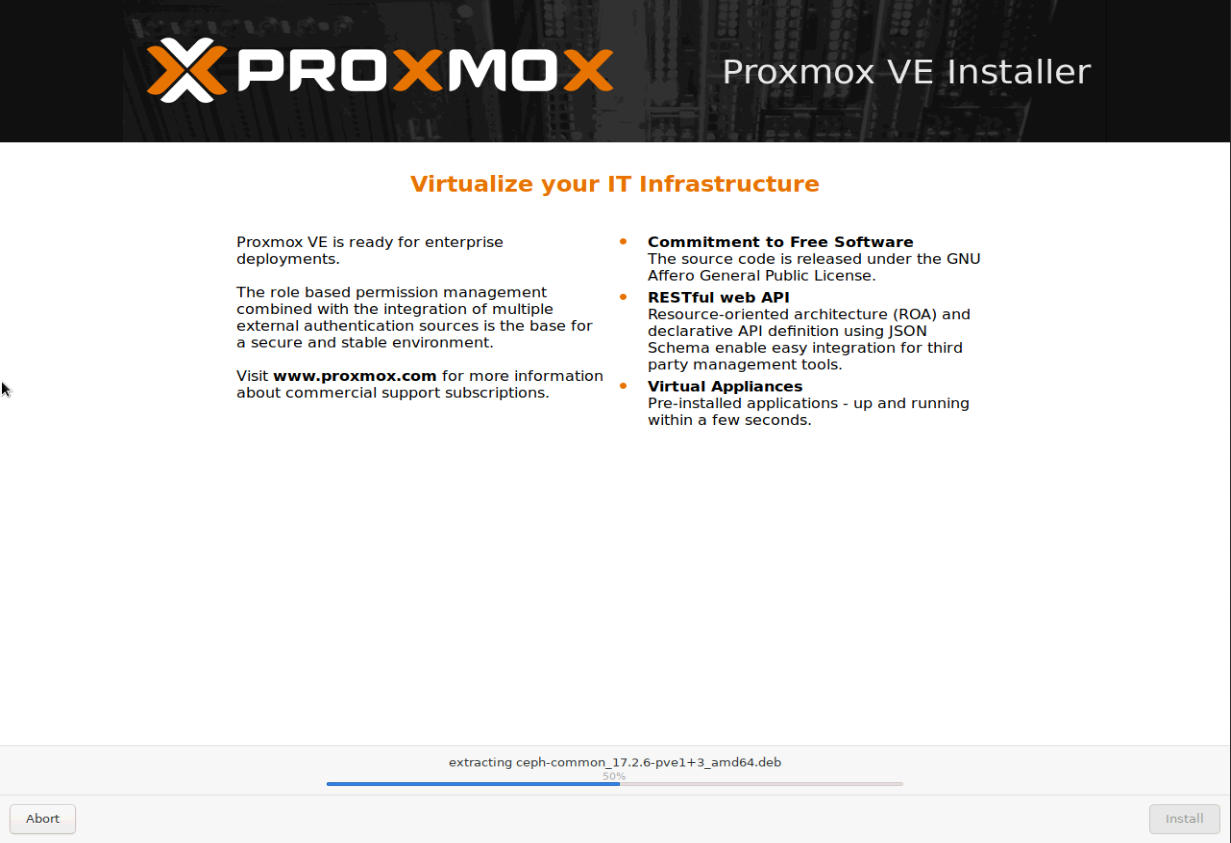
Install. The installation will now begin.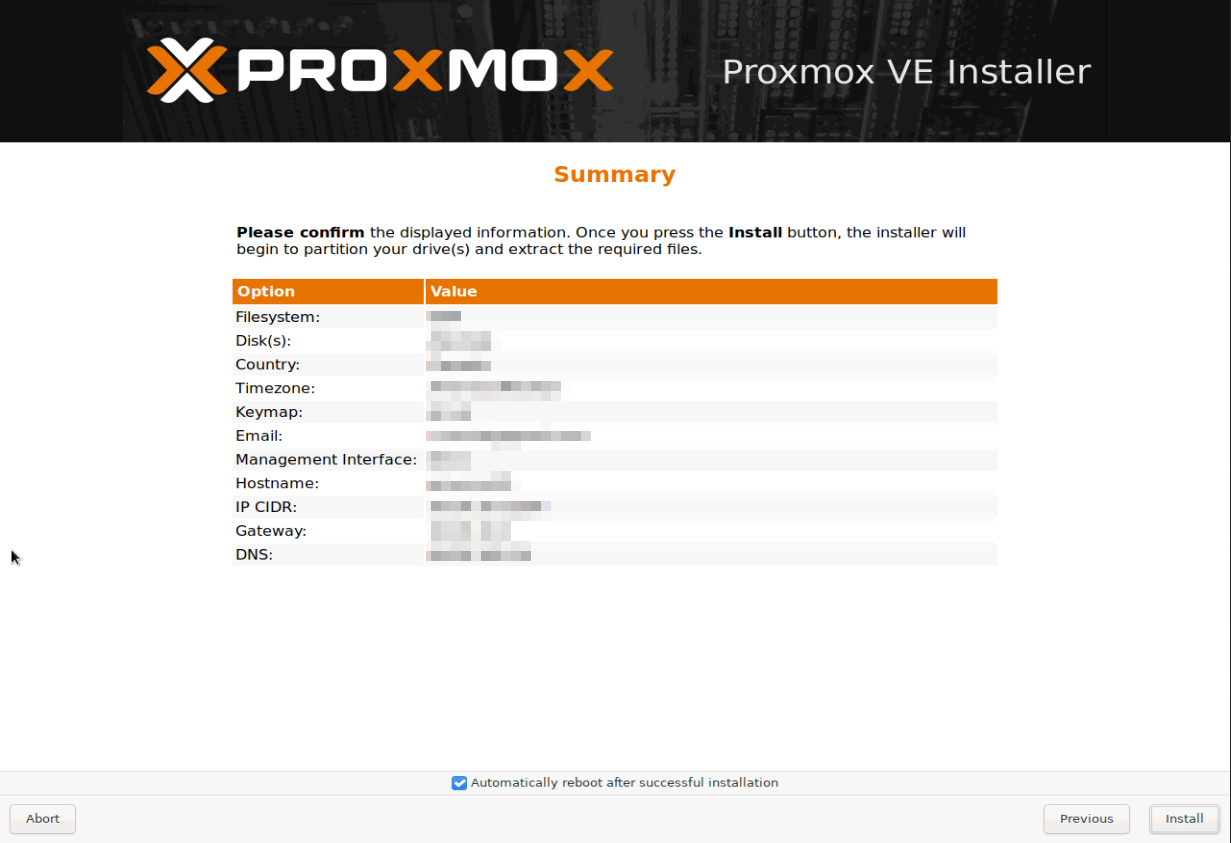
 —
—
Initial Configuration
- Once the installation is complete, the machine will reboot provided you left the checkbox checked to automatically reboot after installation. If you unchecked the box, then reboot the machine manually.
- Access the Proxmox web interface by navigating to
https://<your_server_IP>:8006in a web browser.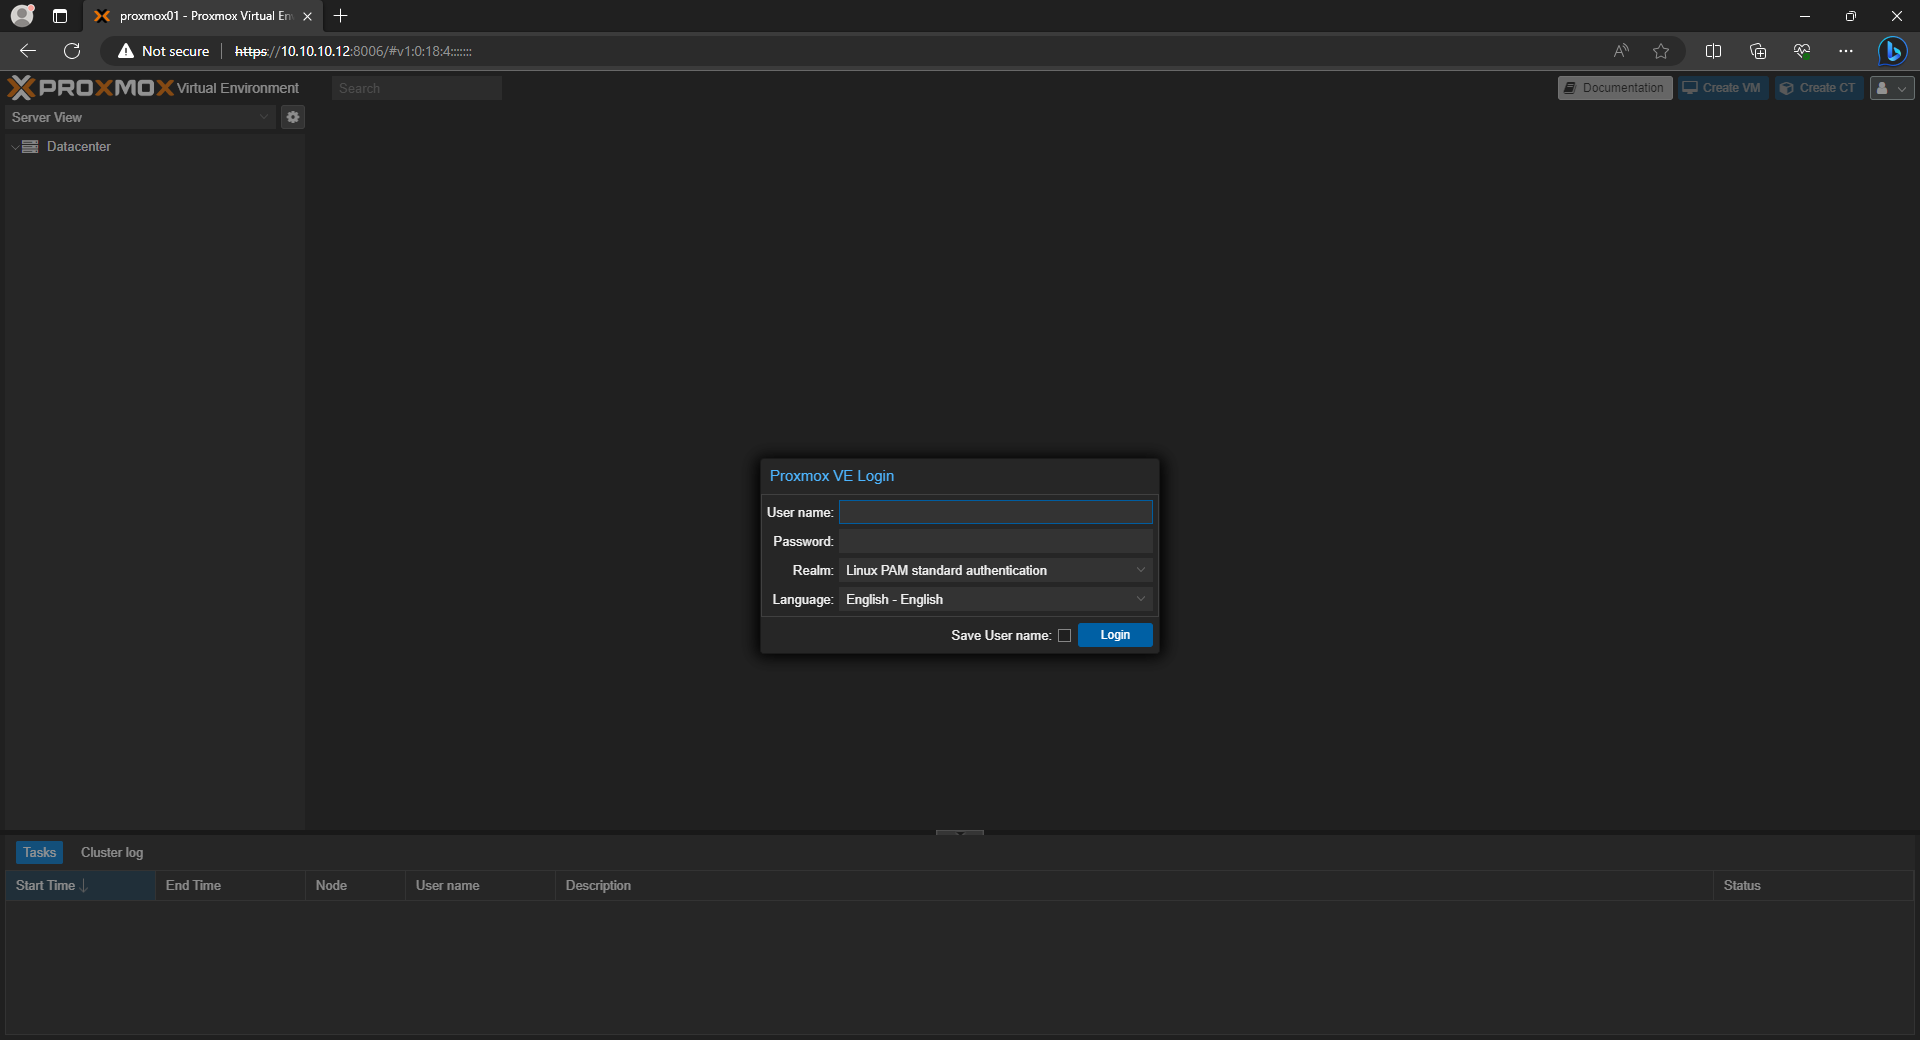
- Log in using the root credentials you set up during the installation.
- You’ll be presented with the Proxmox dashboard. Here, you can start creating virtual machines, containers, and configuring storage.
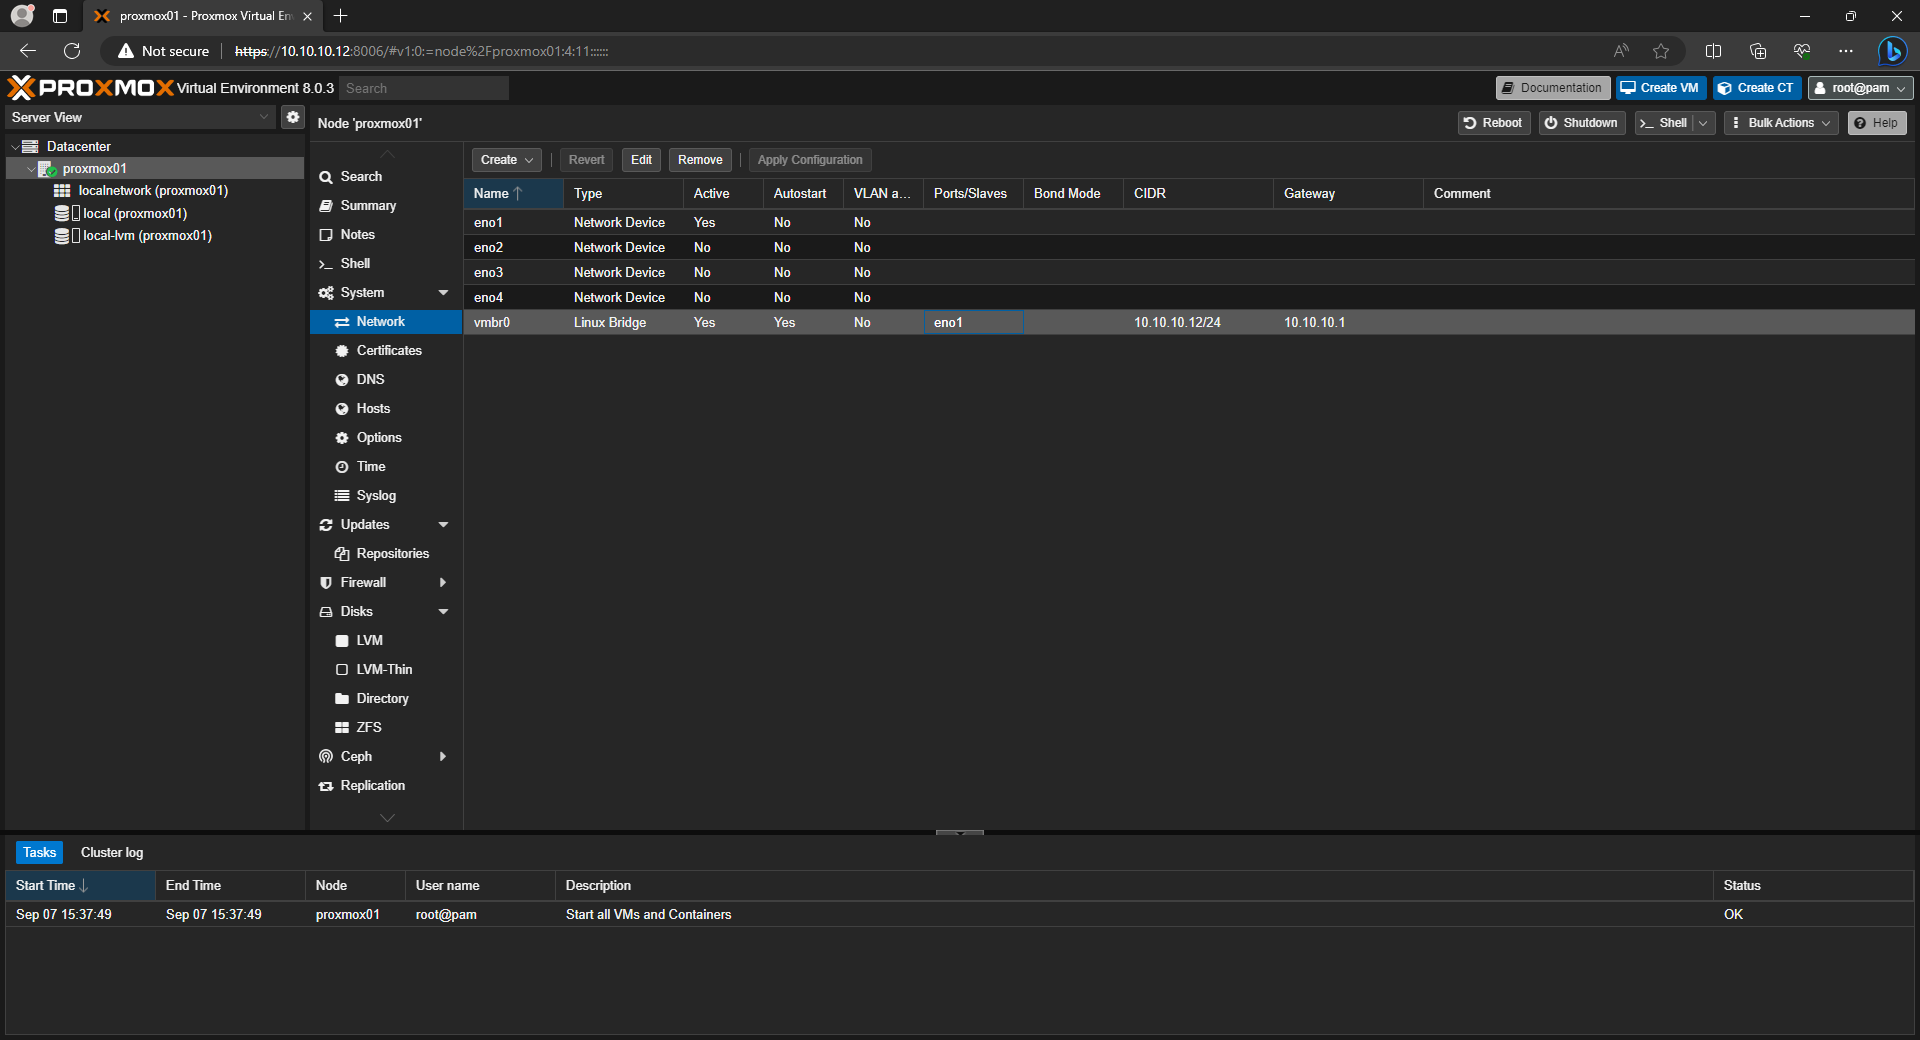
Network Configuration
To ensure the network settings are configured correctly:
Update Proxmox
Proxmox VE updates can be fetched from either the enterprise repository, which requires a paid subscription, or from the no-subscription repository, which is free but considered less stable. In this guide, we’ll utilize the latter to keep things budget-friendly.
Backup Current APT Sources
- SSH into your Proxmox server.
- Before making any changes, backup your existing APT sources for safekeeping.
1
2
cp /etc/apt/sources.list /etc/apt/sources.list.backup
cp -r /etc/apt/sources.list.d/ /etc/apt/sources.list.d.backup
Disable Enterprise Repository
- Use
nanoto edit thepve-enterprise.listfile in the/etc/apt/sources.list.d/directory.1
nano /etc/apt/sources.list.d/pve-enterprise.list
- Comment out the existing enterprise repository line by placing a
#at the beginning of the line.1
# deb https://enterprise.proxmox.com/debian/pve bookworm pve-enterprise - Save the file and exit
nano.
Add the No-Subscription Repository
- Create or edit a new list file specifically for the no-subscription repository.
1
 nano /etc/apt/sources.list
- Add the following line to this new file.
1
 deb http://download.proxmox.com/debian/pve bookworm pve-no-subscription
- Save the file and exit
nano.
Reload
Update and Upgrade Packages
- Run the package update and upgrade commands to fetch and install the latest updates.
1 2
apt-get update apt dist-upgrade -y - Reboot the system.
Debugging and Error Handling
If you encounter errors during this process, make sure to refer to the terminal output and system logs to identify the issues. These details often provide valuable insights for troubleshooting.
By following this updated -de, you should be able to securely update your Proxmox system without requiring a subscription. Note that while this is a viable method for test environments or personal use, a paid subscription is recommended for enterprise-level or critical production systems.
Certainly! Here’s a -de designed to fit into your blog as “ detailing how to add an additional disk to Proxmox, format it with a filesystem, and configure it for storing virtual disks.
Add Additional Disk for Virtual Machine Storage
When expanding your Proxmox server, you might find the need to add more storage specifically designated for your virtual machines. This storage can then be used for things like VM disks, backups, or snapshots. This -de will walk you through the process of adding a new disk to your Proxmox machine, formatting it, and setting it up to be used for virtual disks.
Identify the New Disk
- SSH into your Proxmox server.
- List all the available disks by using the
lsblkorfdisk -lcommand.1
lsblk
This will display a list of all storage devices. Identify the one you want to add, for example
/dev/sdb.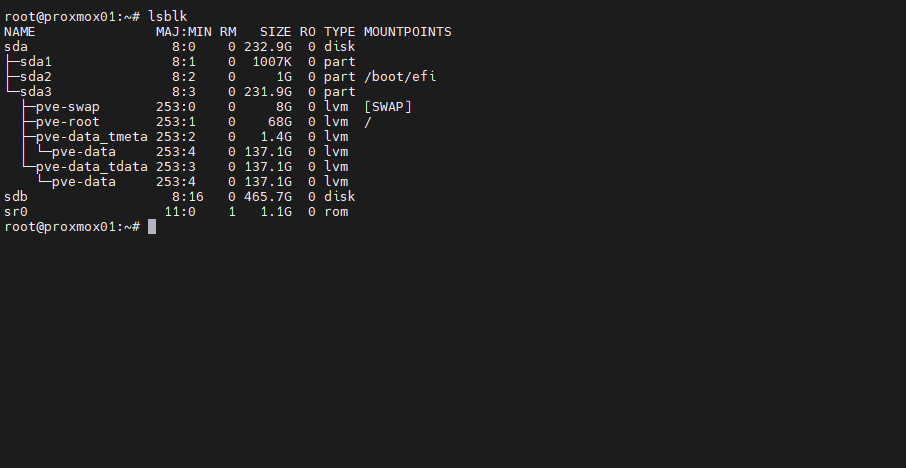
Partition the New Disk
- Run
fdiskto start partitioning the new disk.1
fdisk /dev/sdb
- Follow the on-screen instructions to create a new partition. Usually, you’d press
nto create a new partition, thenpfor primary, and accept the default values to use the entire disk. - Write the partition table and exit by pressing
w.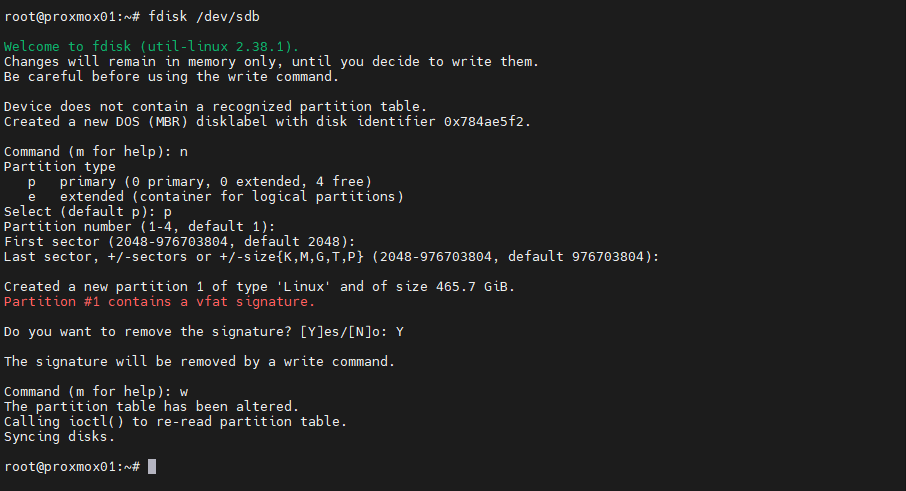
Format the Partition with a Filesystem
- Once the partition is created, format it with your preferred filesystem. For this example, we’ll use the
ext4filesystem.1
mkfs.ext4 /dev/sdb1
- Confirm the partition is formatted correctly by listing the available filesystems.
1
lsblk -f
Mount the New Disk and Configure Proxmox Directory Structure
- Create a mount point for the new partition within the Proxmox directory structure. This is crucial for Proxmox to manage storage effectively.
1
mkdir -p /var/lib/vz/vms
- Mount the partition to this mount point.
1
mount /dev/sdb1 /var/lib/vz/vms
- Edit /etc/fstab to ensure the partition mounts at boot.
1
nano /etc/fstab
- Add the following line:
1
/dev/sdb1  /var/lib/vz/vms ext4 defaults 0 0
Save and exit the editor.
- Test Mount with mount -a – This command will attempt to mount all filesystems described in /etc/fstab and give an error message if there is an issue:
1
sudo mount -a
Configure Proxmox to Use the New Storage
- Navigate to the Proxmox web interface and go to
Datacenter -> Storage -> Add -> Directory. - Fill in the details, pointing
Directoryto/var/lib/vz/vms. Provide anIDsuch asvmstorageand selectDisk Imagefor theContent.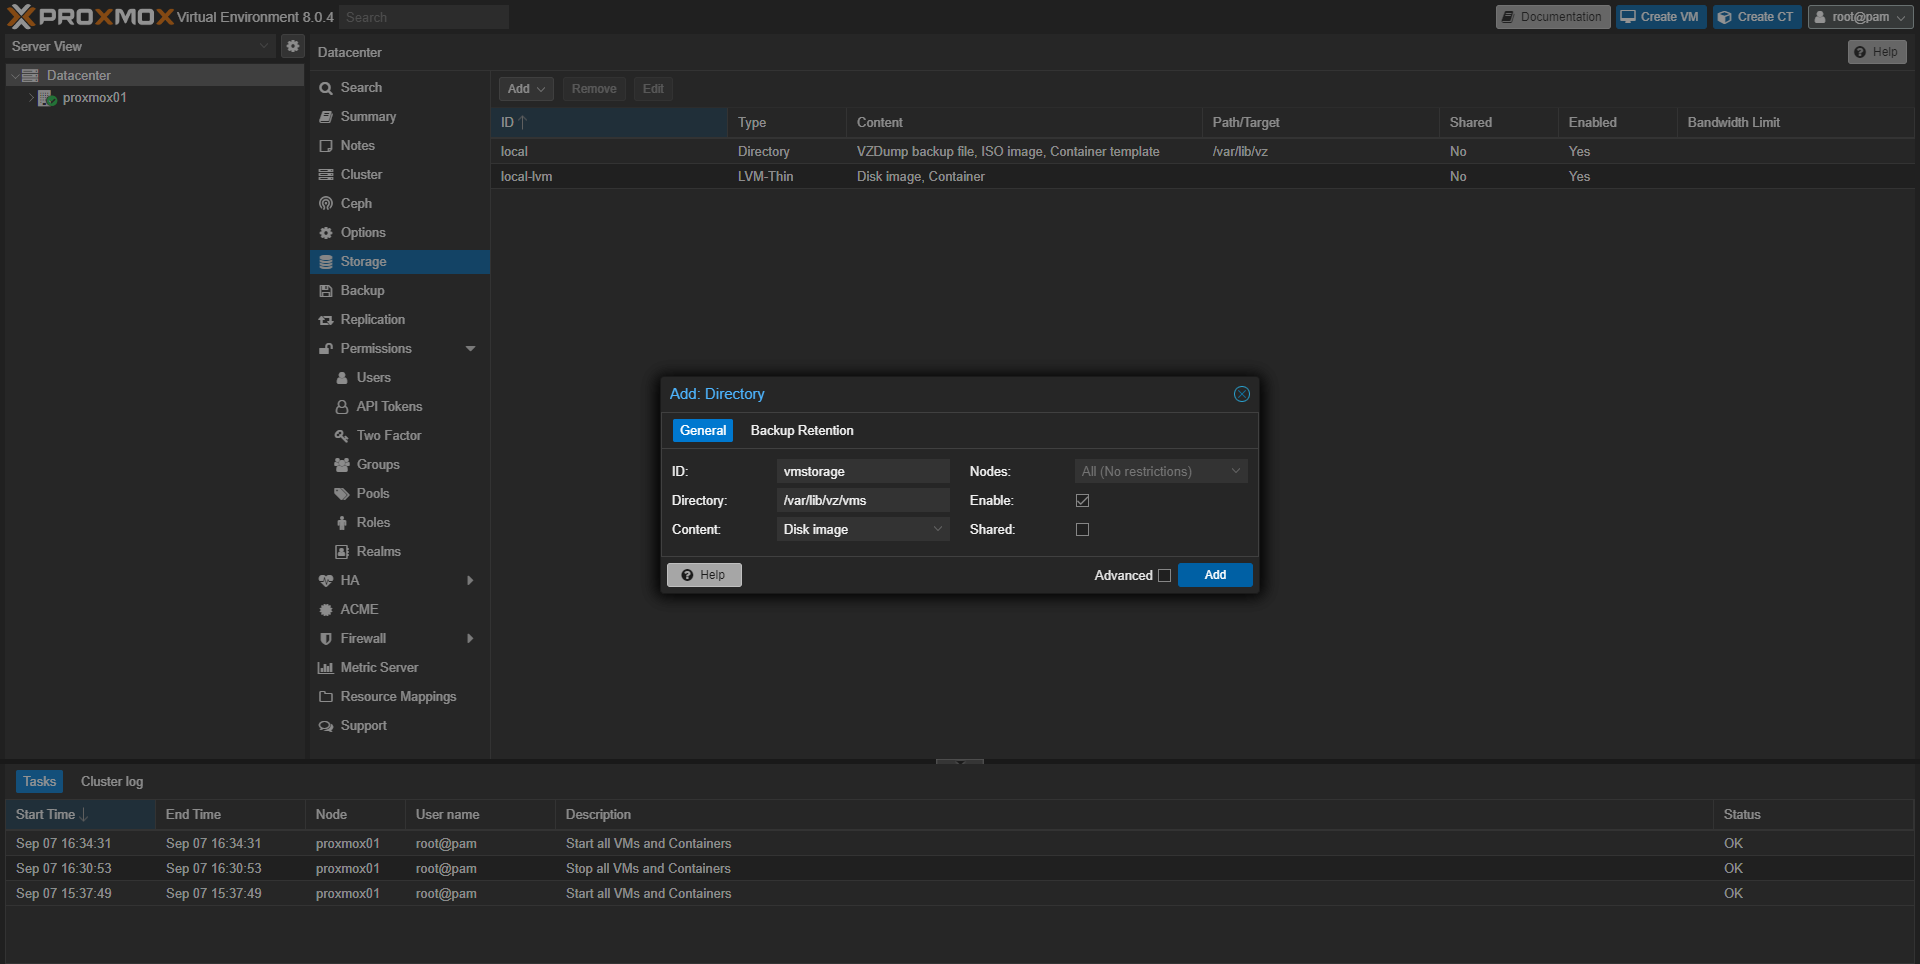
- Click
Addto finalize the storage addition.
Debugging and Error Handling
If you encounter any issues during this process, refer to system logs and terminal outputs for debugging information.
By following this guide, you’ve successfully added a new disk to your Proxmox server, formatted it, and configured it to be used for storing virtual machine disks. This adds a lot more flexibility and scalability to your virtualized setup.
How to Create, Configure, and Manage Virtual Machines in Proxmox
Step 1: Access Proxmox Web Interface and Upload an Operating System ISO
- Open your preferred web browser.
- Navigate to
https://<your-proxmox-server-IP>:8006/. - Log in with your Proxmox credentials.
- Navigate to the Proxmox web interface and go to
Datacenter -> <Proxmox-machine> -> local -> ISO Images.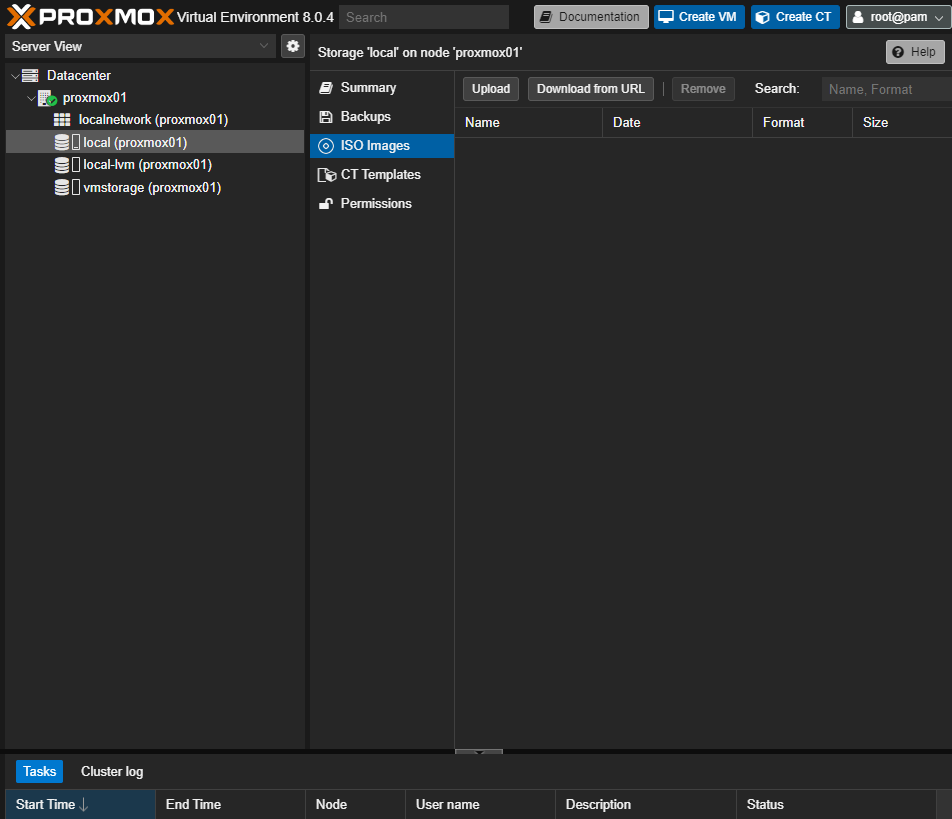
- Click on
Upload, select your ISO Image, then clickUpload.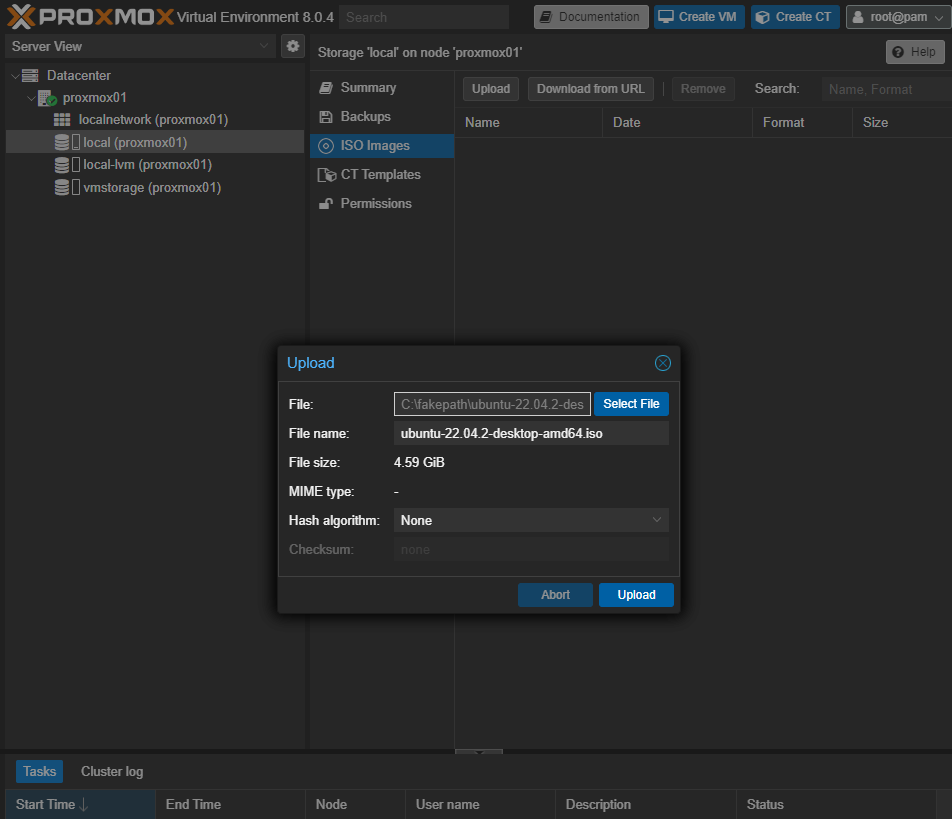
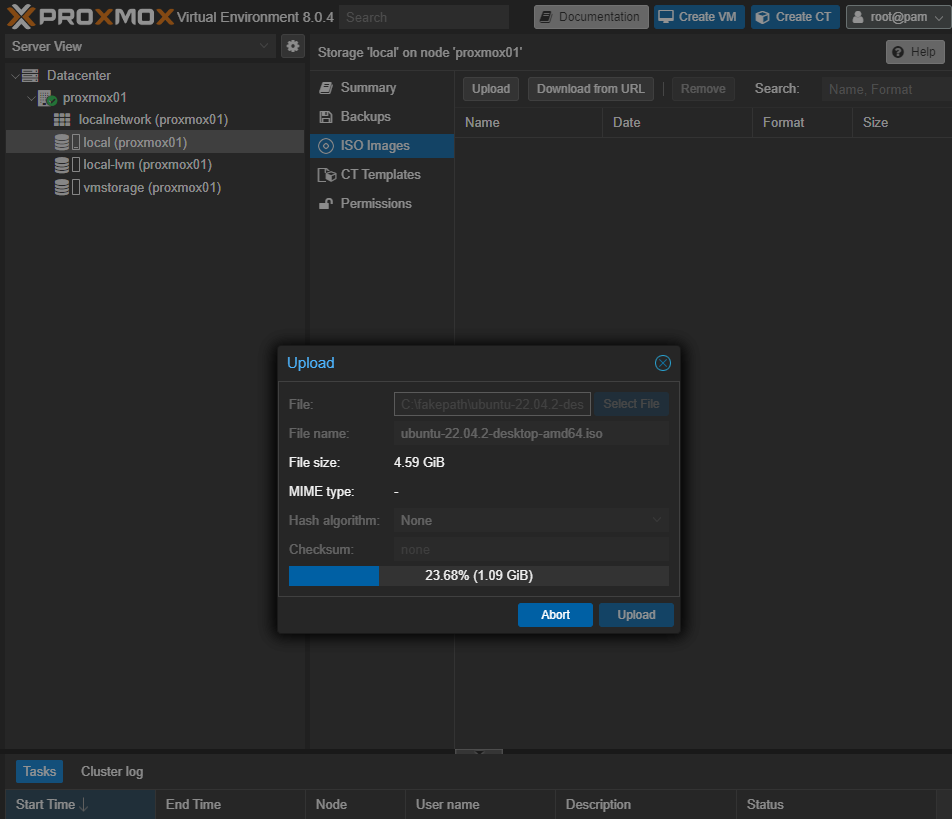
- Wait for the upload to complete then click the X in the upper right hand of the window.
Step 2: Create a New VM
- On the left-hand sidebar, click on your Proxmox server’s name.
- Click the
Create VMbutton at the top-right corner of the interface.
Step 3: VM Configuration Wizard
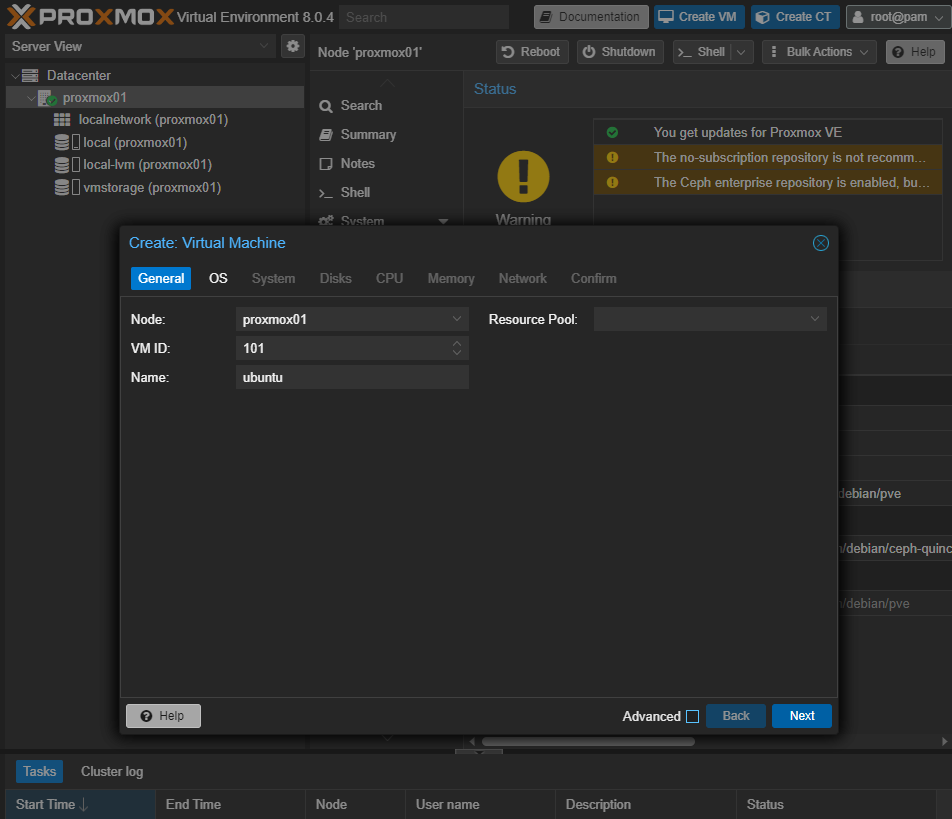
General Tab
- Name: Give your VM a unique name.
- VM ID: Give your VM a unique ID.
- Resource Pool: Leave it as default unless you have specific resource pools.
- Node: Select the Proxmox node where you want to create the VM.
OS Tab
- ISO Image: Select the OS ISO you wish to install.
- OS Type: Choose the appropriate type (e.g.,
Linux,Windows).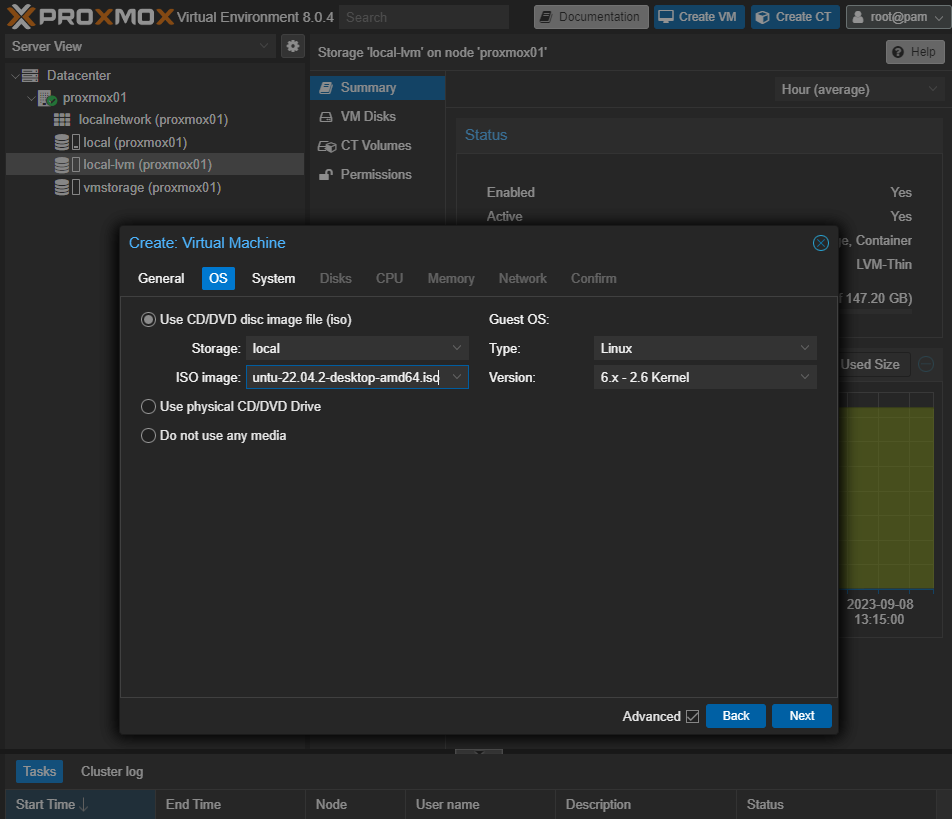
System Tab
- BIOS: Choose the BIOS mode for the VM. For modern OS support and features like secure boot, select OVMF (UEFI).
- SCSI Controller: Choose
VirtIO SCSIfor better performance. - EFI Disk: If you’ve selected UEFI, you’ll need to specify an EFI disk storage location. Select the appropriate storage pool where the EFI disk will be created.
- Format: For the disk image format, select QEMU image format (qcow2) which is the default and most flexible option.
- Qemu Agent: Check this box to enable the QEMU Guest Agent, which provides improved management capabilities and performance statistics.
- Add TPM: If you need to secure the VM at the hardware level, you can enable TPM (Trusted Platform Module) by checking this box. Reccomended to turn this on if you plan on using Bitlocker (Windows) or LUKS disk encryption (Linux).
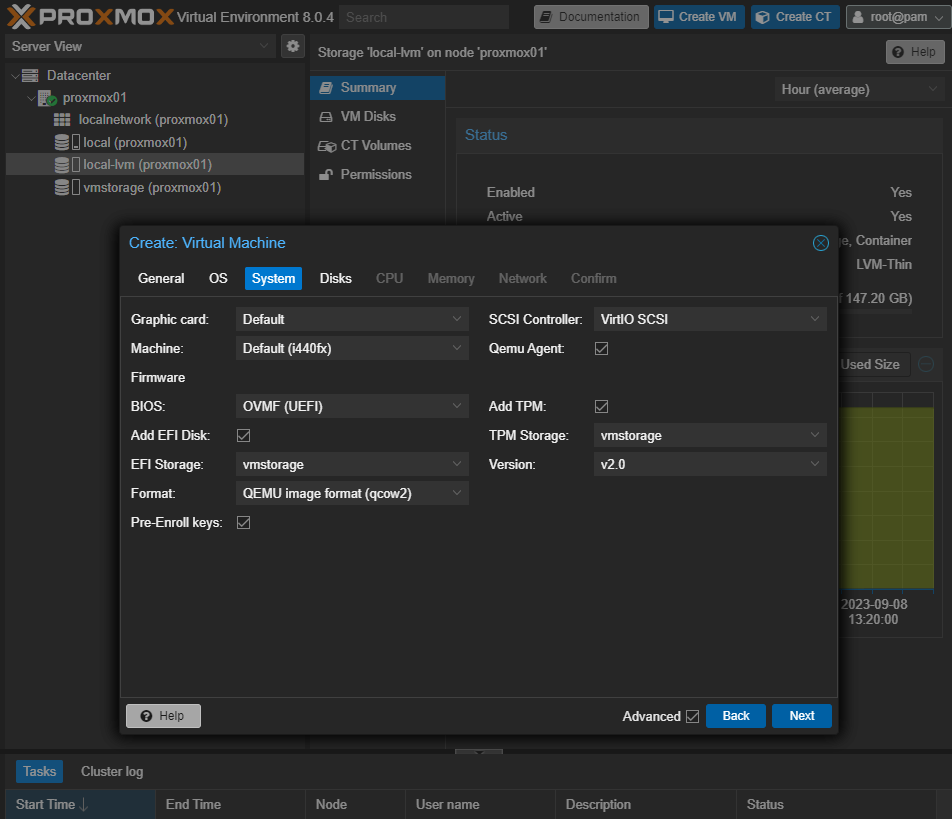
Click Next to continue.
Hard Disk
- Storage: Choose the storage pool where you want the VM’s disk image to be stored (e.g.,
local-lvm,VM_Storage). - Cache: Opt for
Nonefor data integrity orWrite backfor better performance but a potential risk of data loss on power failure. - Disk Size: Enter the initial size of the disk. This can usually be expanded later (e.g.,
32Gfor 32 gigabytes). - Discard: Check this box if you want to allow the guest OS to send TRIM/DISCARD commands to the host. Useful for SSDs and thin-provisioned storage.
- IO Thread: Increase this number to allocate additional IO threads for disk access. Useful for VMs requiring high disk I/O.
- SSD Emulation: Check this box if you want to emulate an SSD instead of an HDD, even if the underlying storage is not an SSD. This may affect the guest OS’s optimization algorithms.
- Skip Replication: If you have a Proxmox cluster and do not want this disk to be replicated to other nodes, check this box.
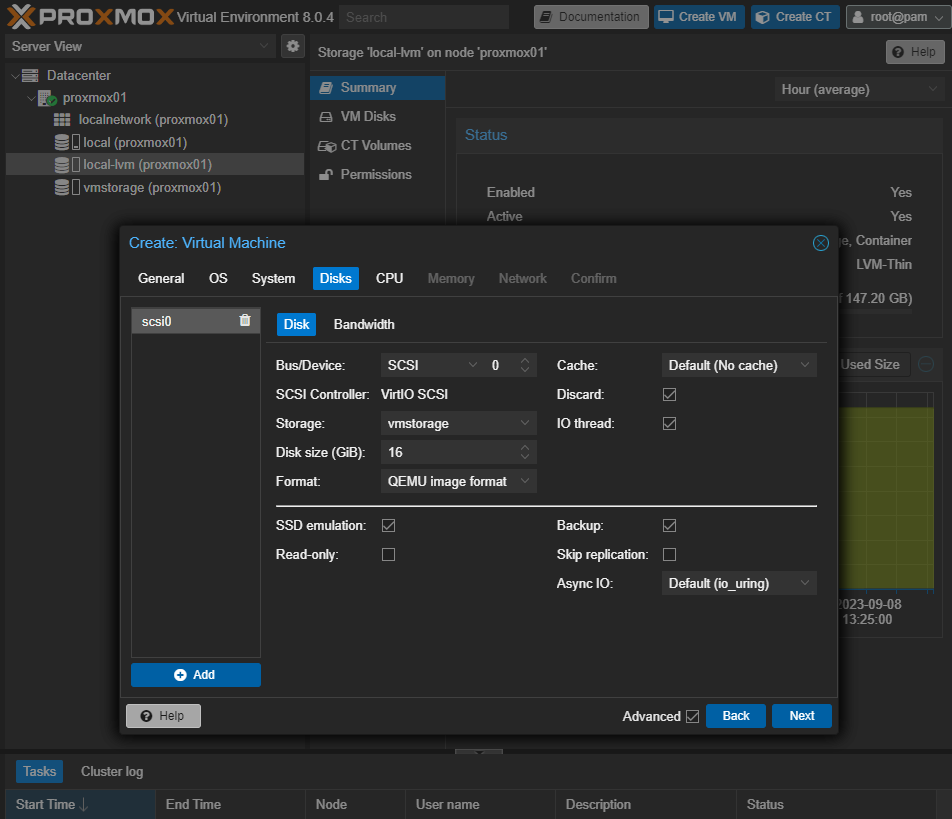
Click Next to continue.
CPU
- Sockets: Number of CPU sockets.
- Cores: Number of cores per socket.
- Type: Usually host-model or x86-64-v2-AES as per the Proxmox version.
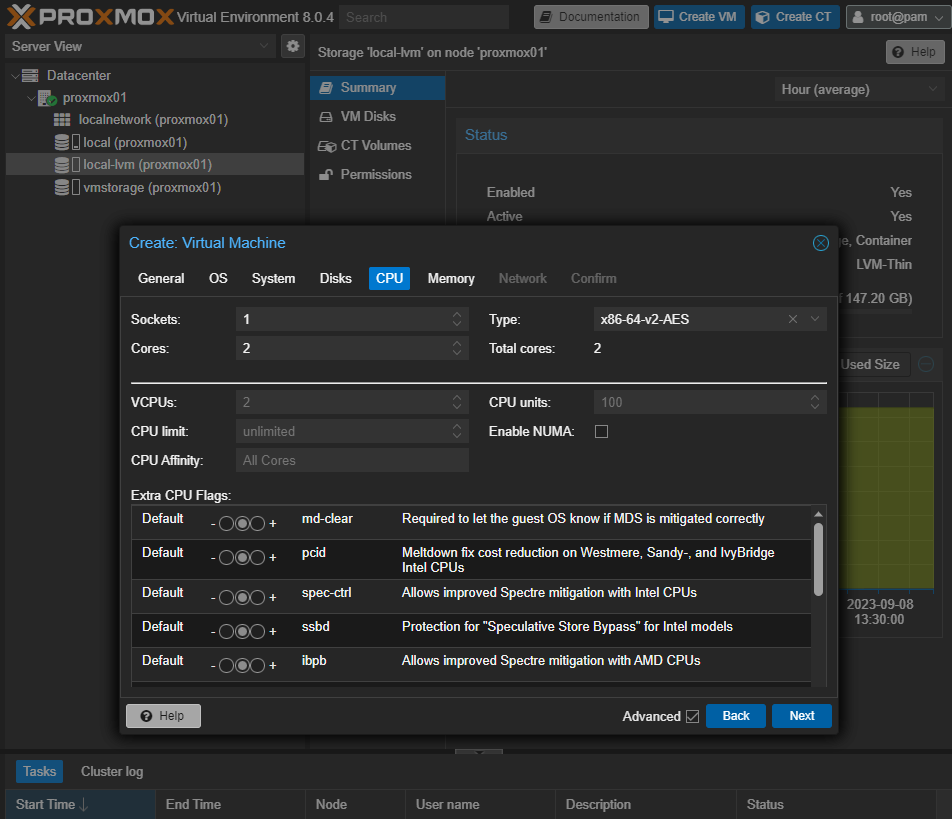
Click Next to continue.
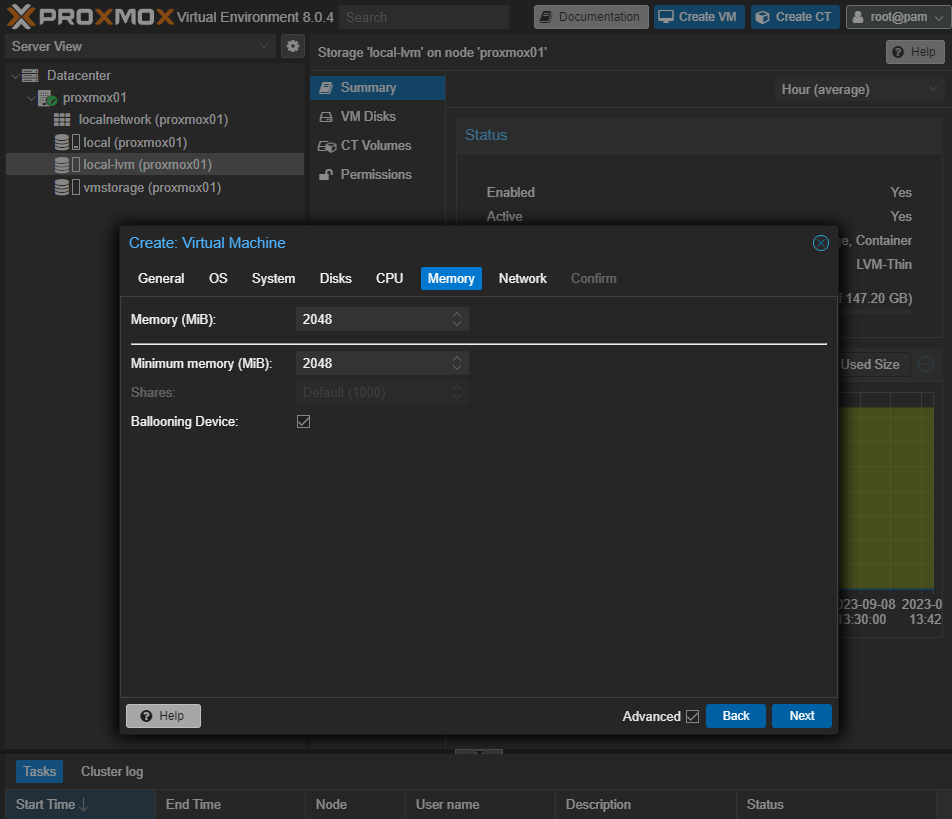
Memory
Click Next to continue.
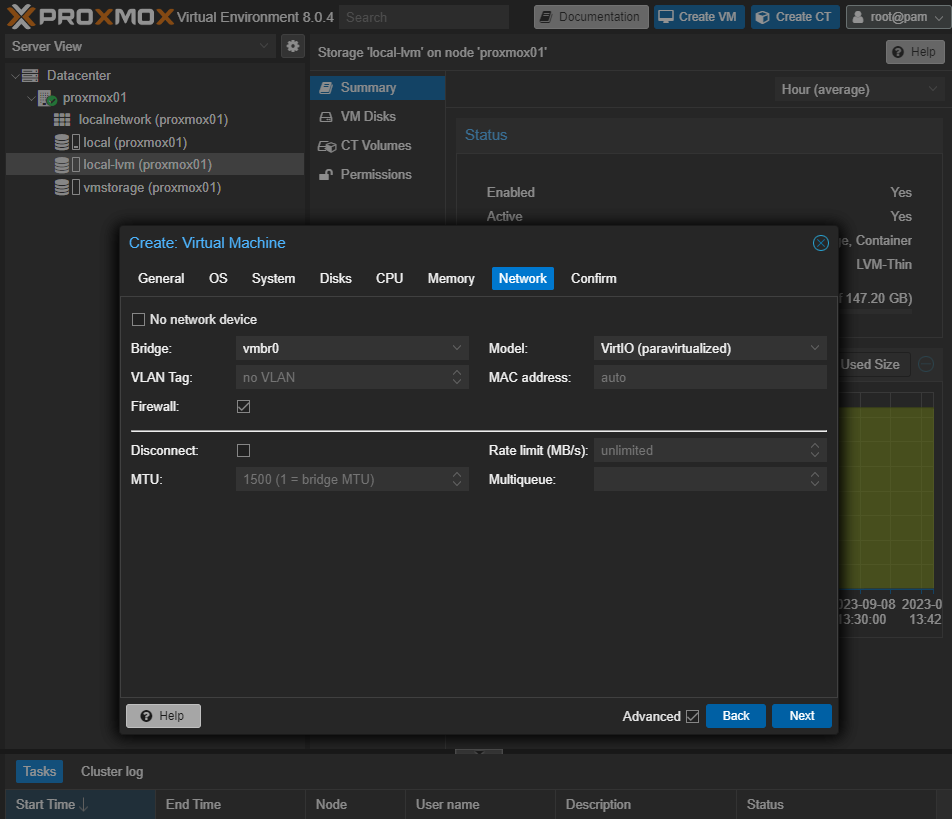
Network
Click Next to continue.
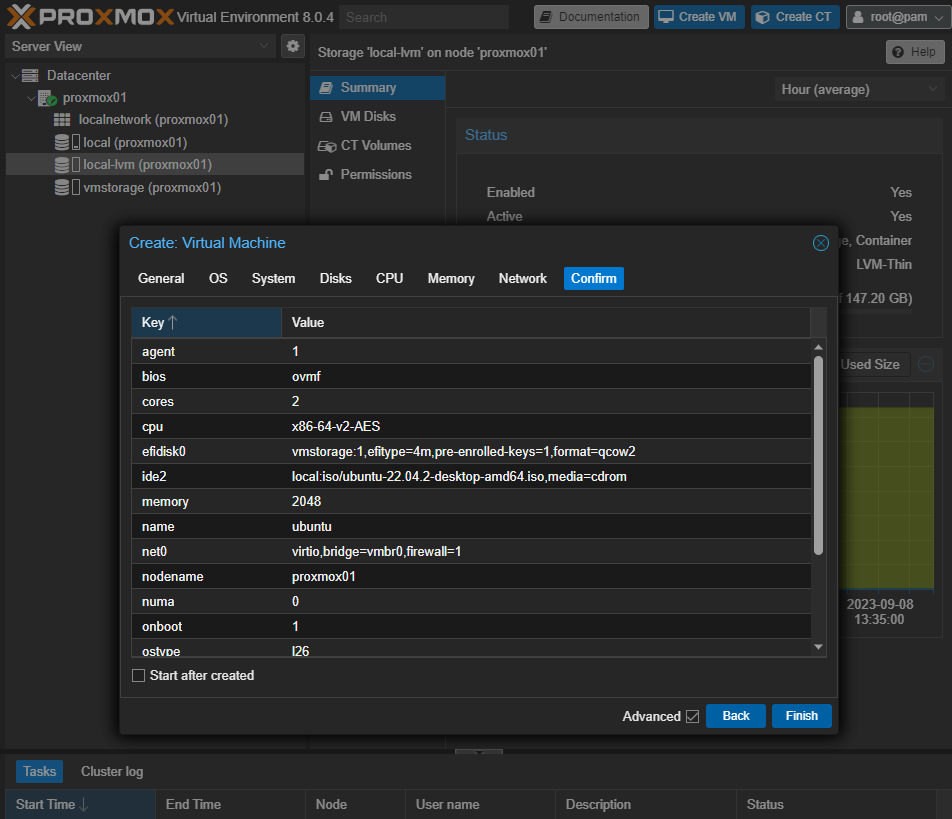
Create the VM
Step 4: Start the VM and Install the OS
- Go to the
Summarytab of your newly created VM. - Click
Start. - Open the
Consoleto proceed with the OS installation. —
—
Step 5: Basic VM Operations
Start, Stop, and Reboot
You can perform these operations from the Proxmox web interface by using the buttons on the top-right corner.
Snapshots
- Navigate to the
Snapshottab. - Click
Take Snapshot. - Give the snapshot a name and click
OK.
Backups
- Go to
Backuptab. - Click
Backup Now. - Choose your backup options and click
Backup.
Setting up VLans - Allow Proxmox to be VLAN Aware
Backup and edit the interfaces configuation file located in /etc/network.
1
2
3
cd /etc/network
cp interfaces interfaces.bak
nano interfaces
Edit the interfaces configuarion file to create sub interfaces so we can assign them to Vlans:
1
2
3
4
auto vmbr0.{Vlan Number}
iface vmbr0 inet static
        address {IP Address}/{Subnet Mask}
        gateway {Gateway IP Address}
Make sure to remove address and gateway from the bridge interface.
Basic Security Measures
Here are some fundamental security ou can take:
- Enable the firewall under
Datacenter->Node->Firewall. - Use strong authentication methods for SSH and Proxmox web access.
- Regularly update and upgrade the system to receive security patches.
Conclusion
You have successfully installed and configured Proxmox VE on your server or computer. This guide should serve as a foundation, allowing you to start deploying virtual machines and containers effectively. For advanced configurations and optimizations, refer to the Proxmox documentation and community resources.
Featured Tweet
</blockquote>Ready to dive into #ProxmoxVE but not sure where to start? Look no further! Learn everything from installation to initial config, helping you set up a robust virtual environment in no time.#Virtualization #SysAdmin #TechGuide #Proxmox #Homelabhttps://t.co/0kkwHVCvPa
— rcdevops (@rcdevops) November 8, 2023

