Setting up a Cloudflare SSL/TLS Origin Certificate with NGINX
Last Updated: March 22, 2024
Introduction –
Incorporating security best practices is essential when setting up SSL/TLS certificates for your website. This guide walks you through securing your NGINX server with Cloudflare’s SSL/TLS certificates, emphasizing the importance of encryption in safeguarding web communications.
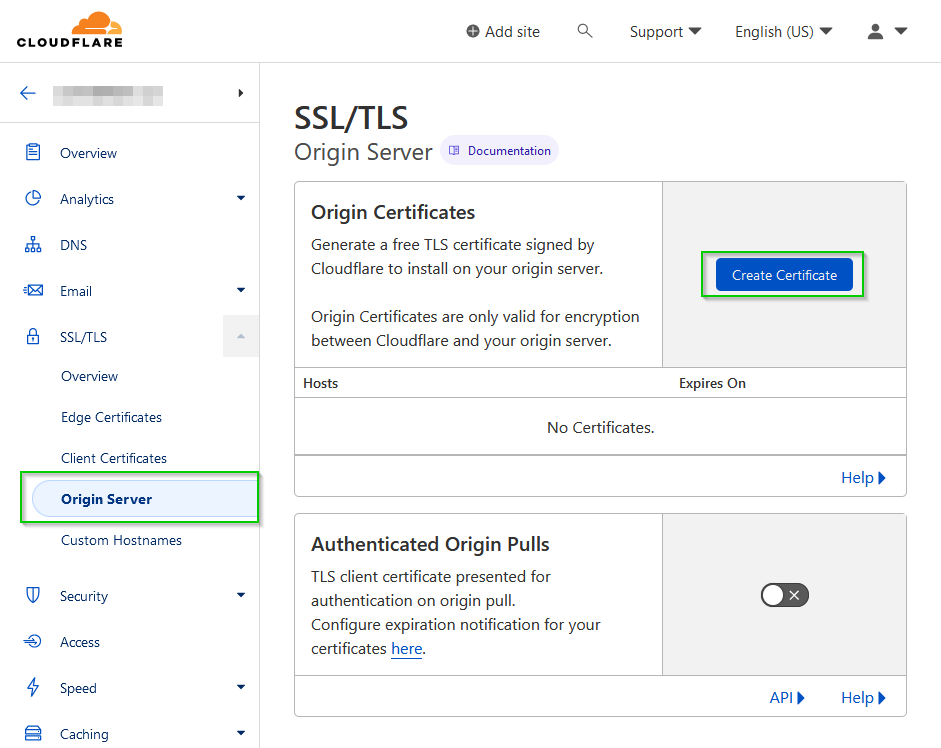
Login to your Cloudflare account and select the domain you wish to create the SSL/TLS Origin certificate on. You can buy a domain from Cloudflare or from another website like Namecheap. Expand the SSL/TLS tab on the left-hand pane, select Origin Server and click on Create Certificate.
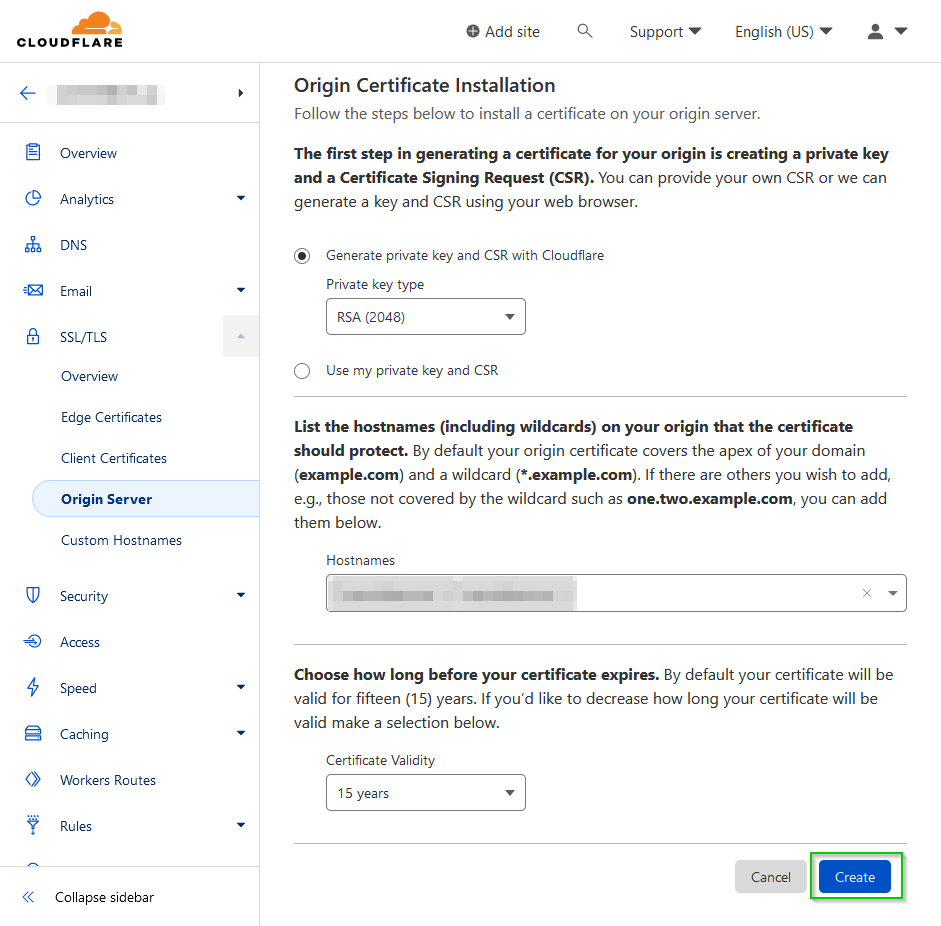
Keep the default settings to generate the private key as RSA (2048) and an expiration of 15 years. Click Create.
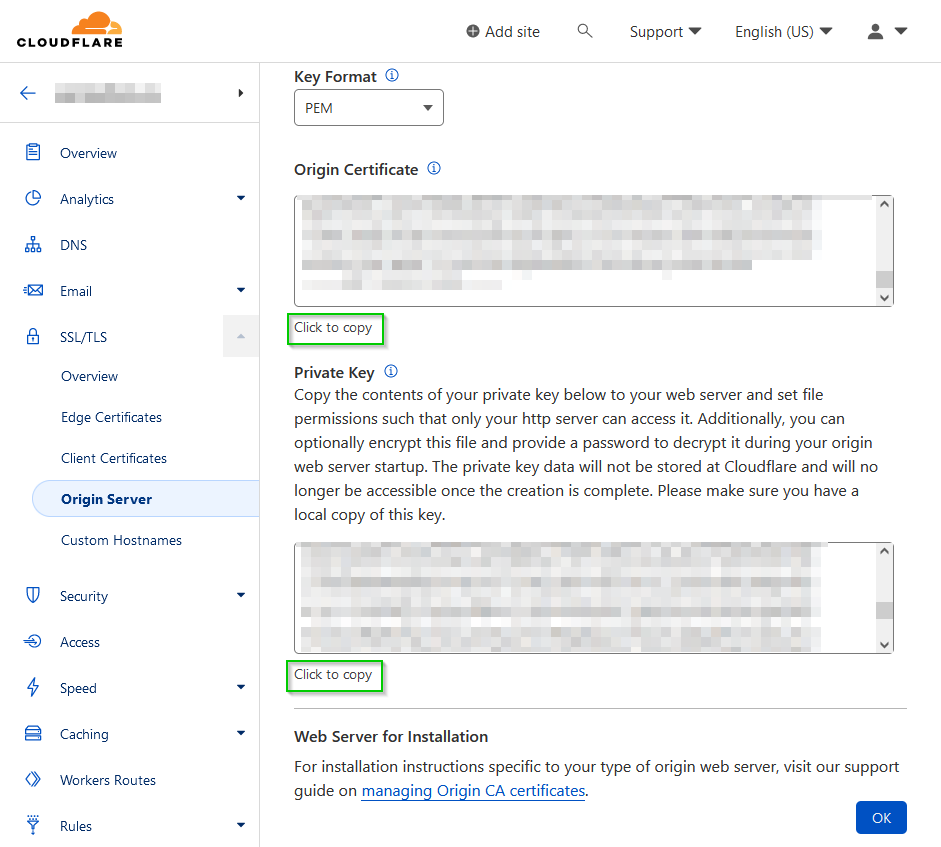
Copy and paste the contents of the origin certificate into a new file named something like origin-certificate.pem (ensure that the file ends with the .pem file extension).
Copy and paste the contents of the Private Key into a new filed named something like private-key.key (with the .key file extenstion). Make sure that you have this saved in a secure location, and that it is backed up, as you won’t be able to re-download it at a later date.
Click OK when done.
Transfer the certificate and private key to your NGINX host, and save them to a directory such as /etc/ssl (your file structuce might vary).
Make a backup of your NGINX configuration file, and open it in your favorite text editor:
1
2
cp /etc/nginx/conf.d/default.conf /etc/nginx/conf.d/default.conf.bak
vi /etc/nginx/conf.d/default.conf
Replace port 80 with port 443 for HTTPS traffic, and add the ssl_certificate and ssl_certificate_key properties and values. Update the NGINX configuration file to look like this:
1
2
3
4
5
6
7
8
9
10
11
12
13
14
15
server {
  listen 443 ssl http2;
  listen [::]:443 ssl http2;

  ssl_certificate       /etc/nginx/ssl/origin-certificate.pem;
  ssl_certificate_key   /etc/nginx/ssl/<domain>-private-key.key;

  server_name <domain>.com www.<domain>.com;

  location / {
    try_files $uri $uri/ /index.php?q=$uri&$args;
  }
  root /var/www/html;
  index index.php;
}
Test the NGINX configuration and restart the NGINX server to apply the changes.
1
2
nginx -t
service nginx restart
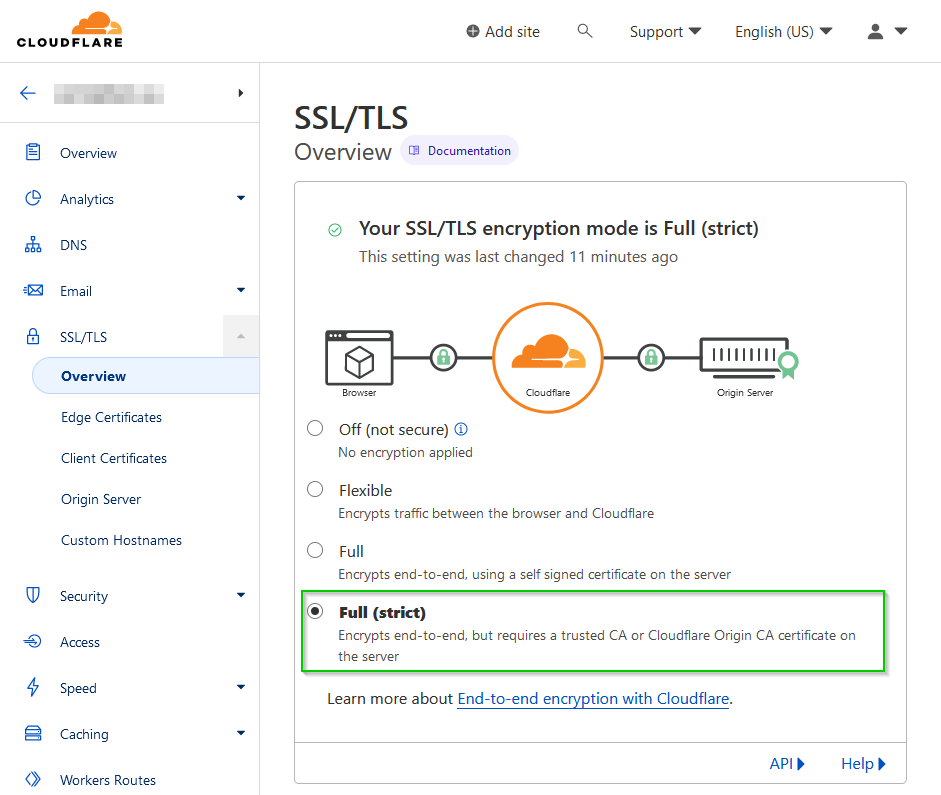
Next, in the Cloudflare portal for your domain. Once again navigate to Overview section in the SSL/TLS. Now select Full (strict) as the encryption mode for your site.
Open your website in your favorite web browswer. If everything worked out, your website will be accessible and will be using a fully encrypted connection to Cloudflare’s servers.
You can also enable the Always Use HTTPS option in the Edge Certificate sections of the SSL/TLS tab in Cloudflare.
If you are using WordPress, you can use a plugin such as Really Simple SSL to encrypt all HTTP requests on your site.
Featured Tweet
Learn how to setup a Cloudflare SSL/TLS Origin Certificate with NGINX!https://t.co/Jr2JJFiFls#cloudflare #nginx #ssl #tls #https #certificates #sysadmin #homelab #technology
— rcdevops (@rcdevops) March 22, 2024


